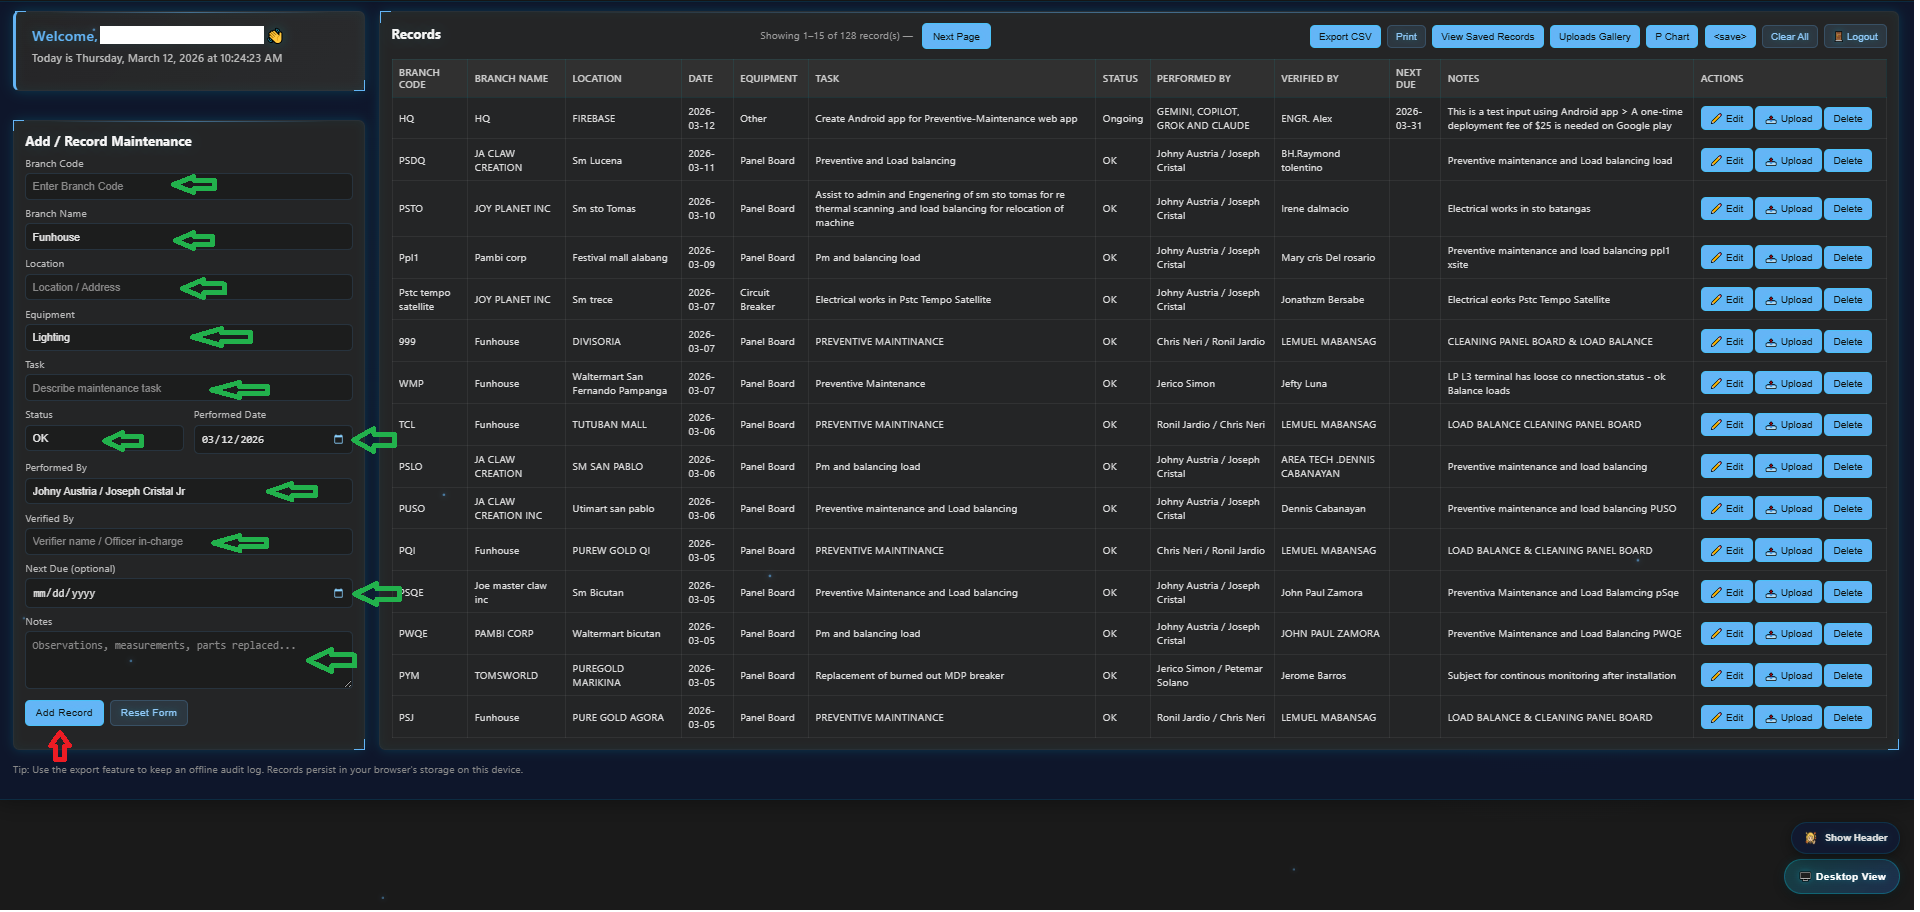
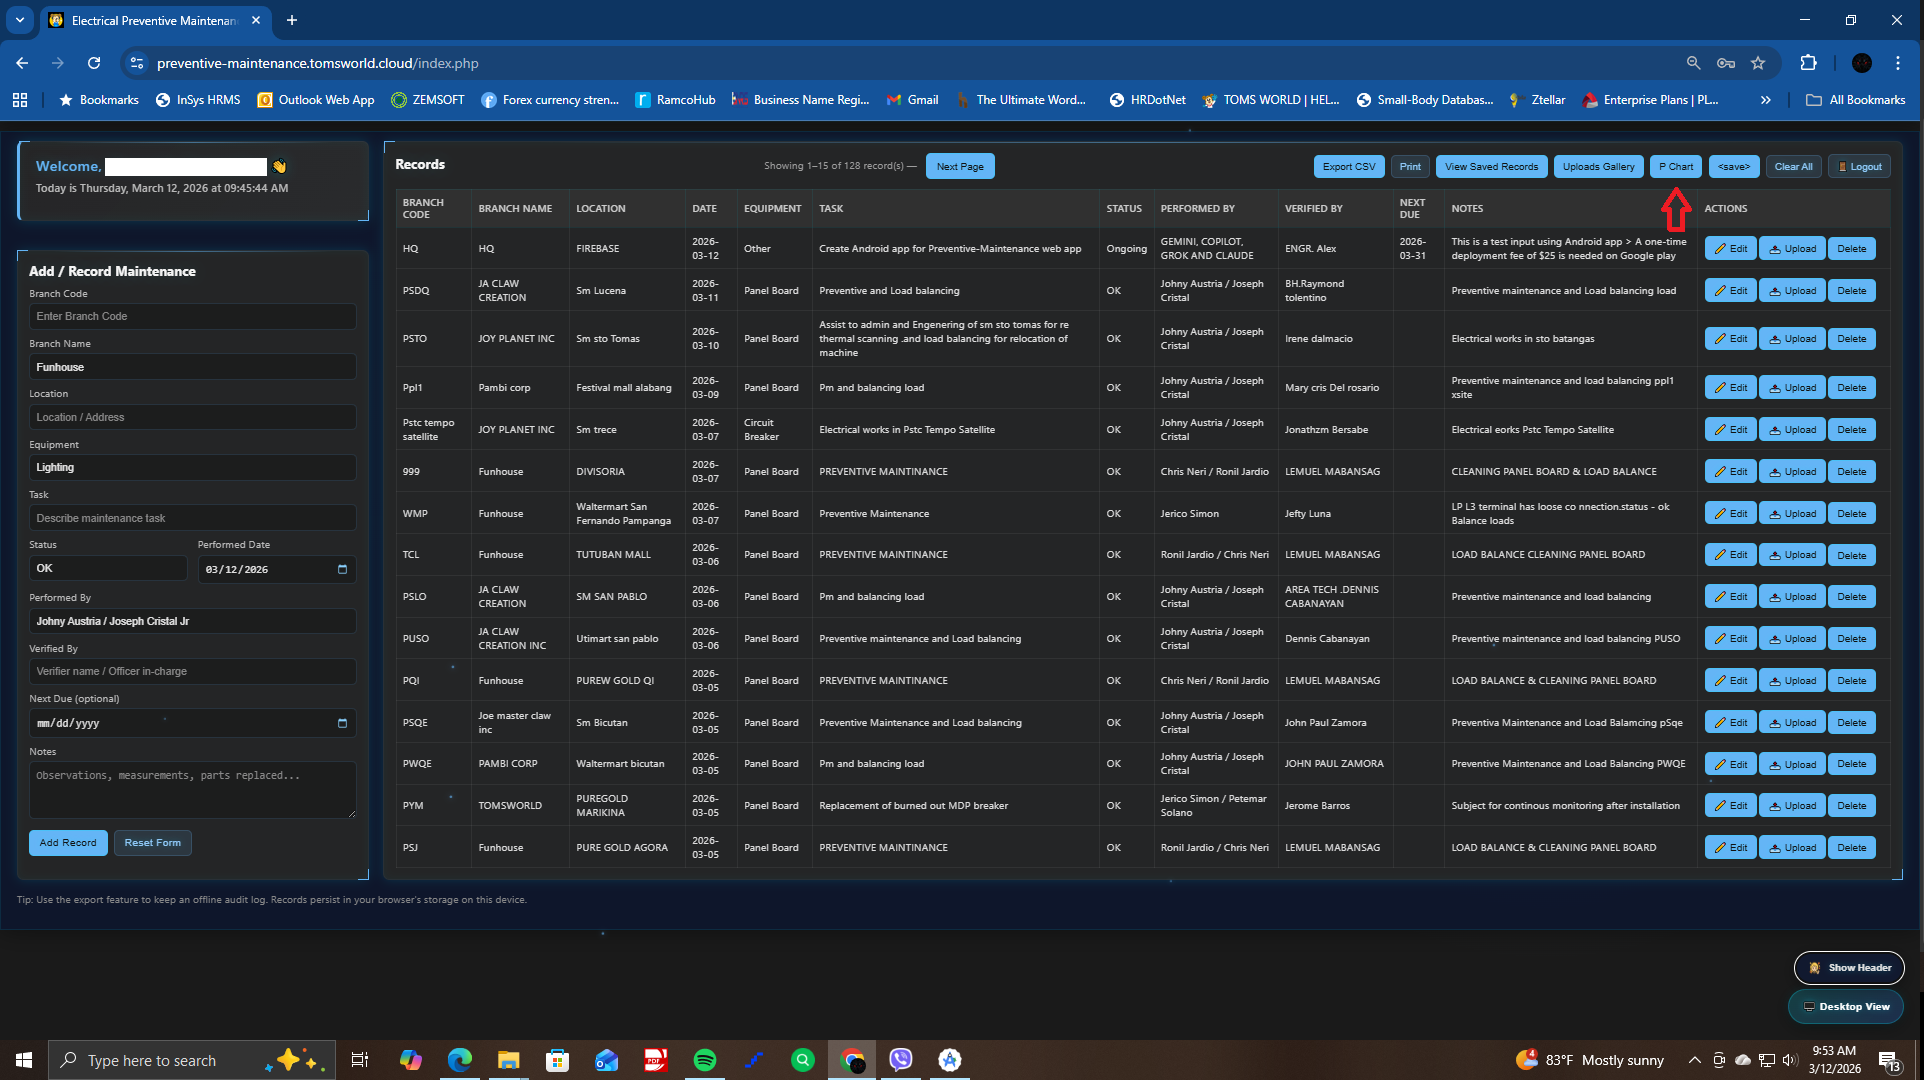
2. On the homepage, fill in the required details (store name, branch code, performed task, date, etc.).
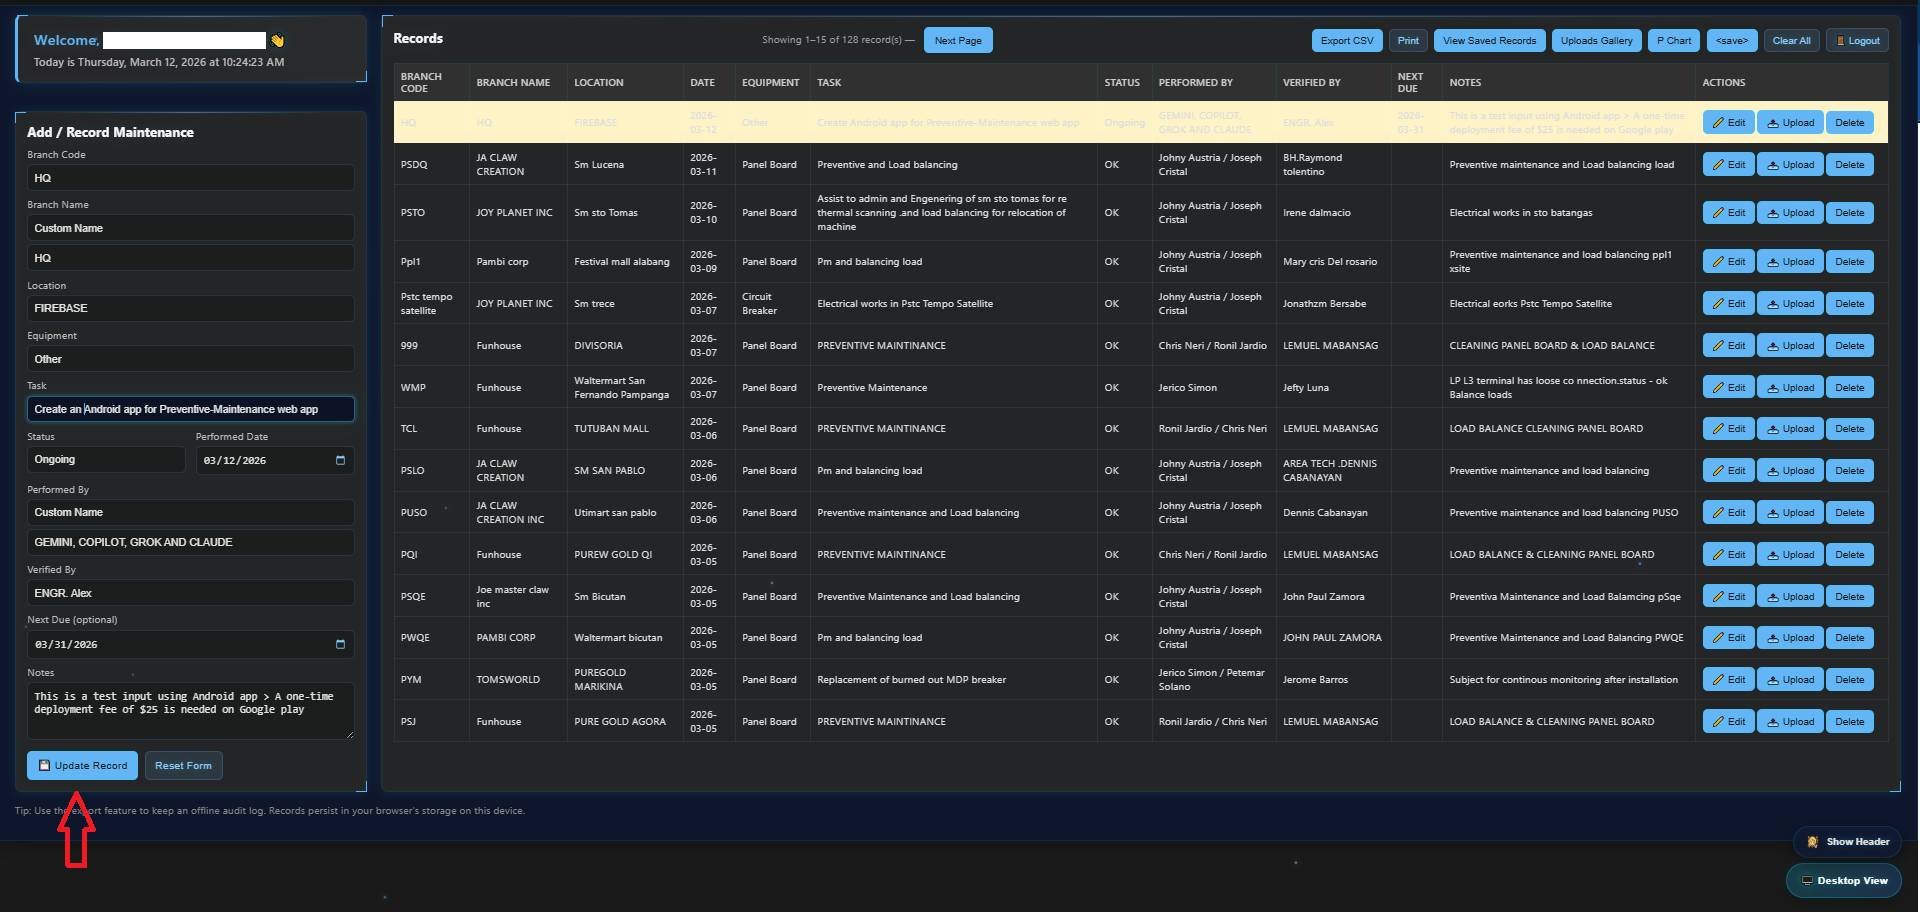
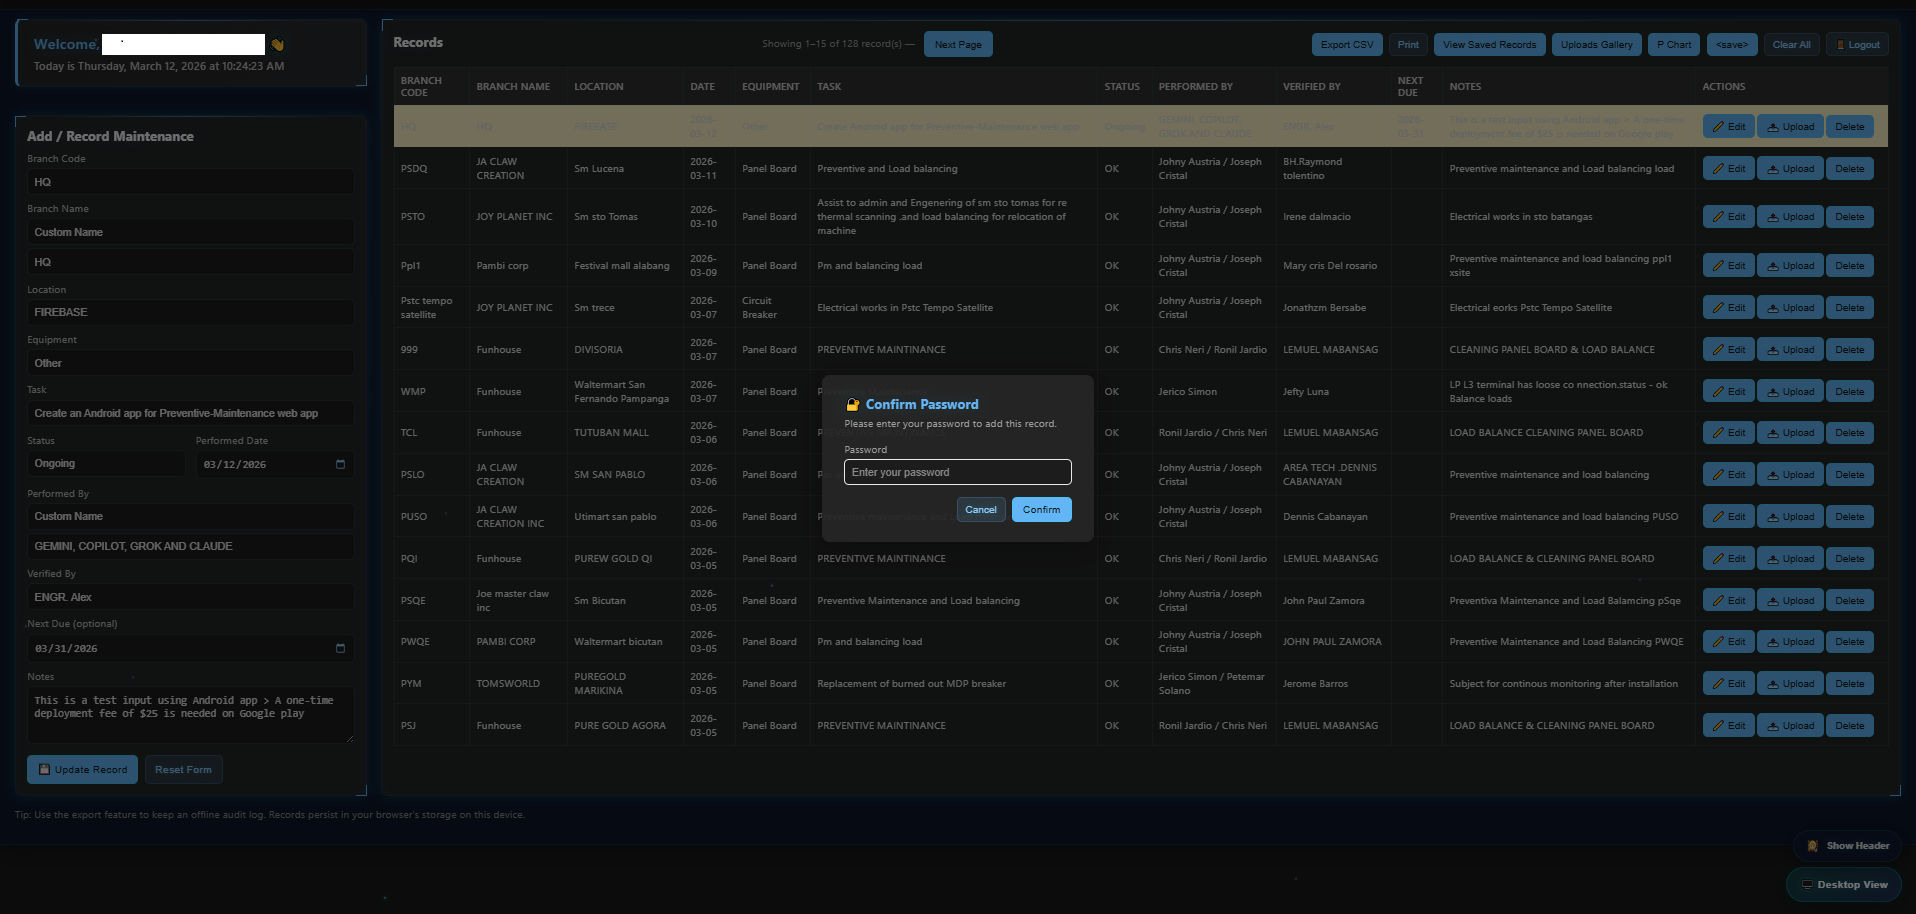
3. Tap Add Record at the bottom 4. When prompted, enter your password to save the record. 5. Review your record in the list. If everything is correct, proceed to step 8 6. If you need changes, tap Edit, update the details, then tap Update Record.
7. When prompted, enter your password to save the update.
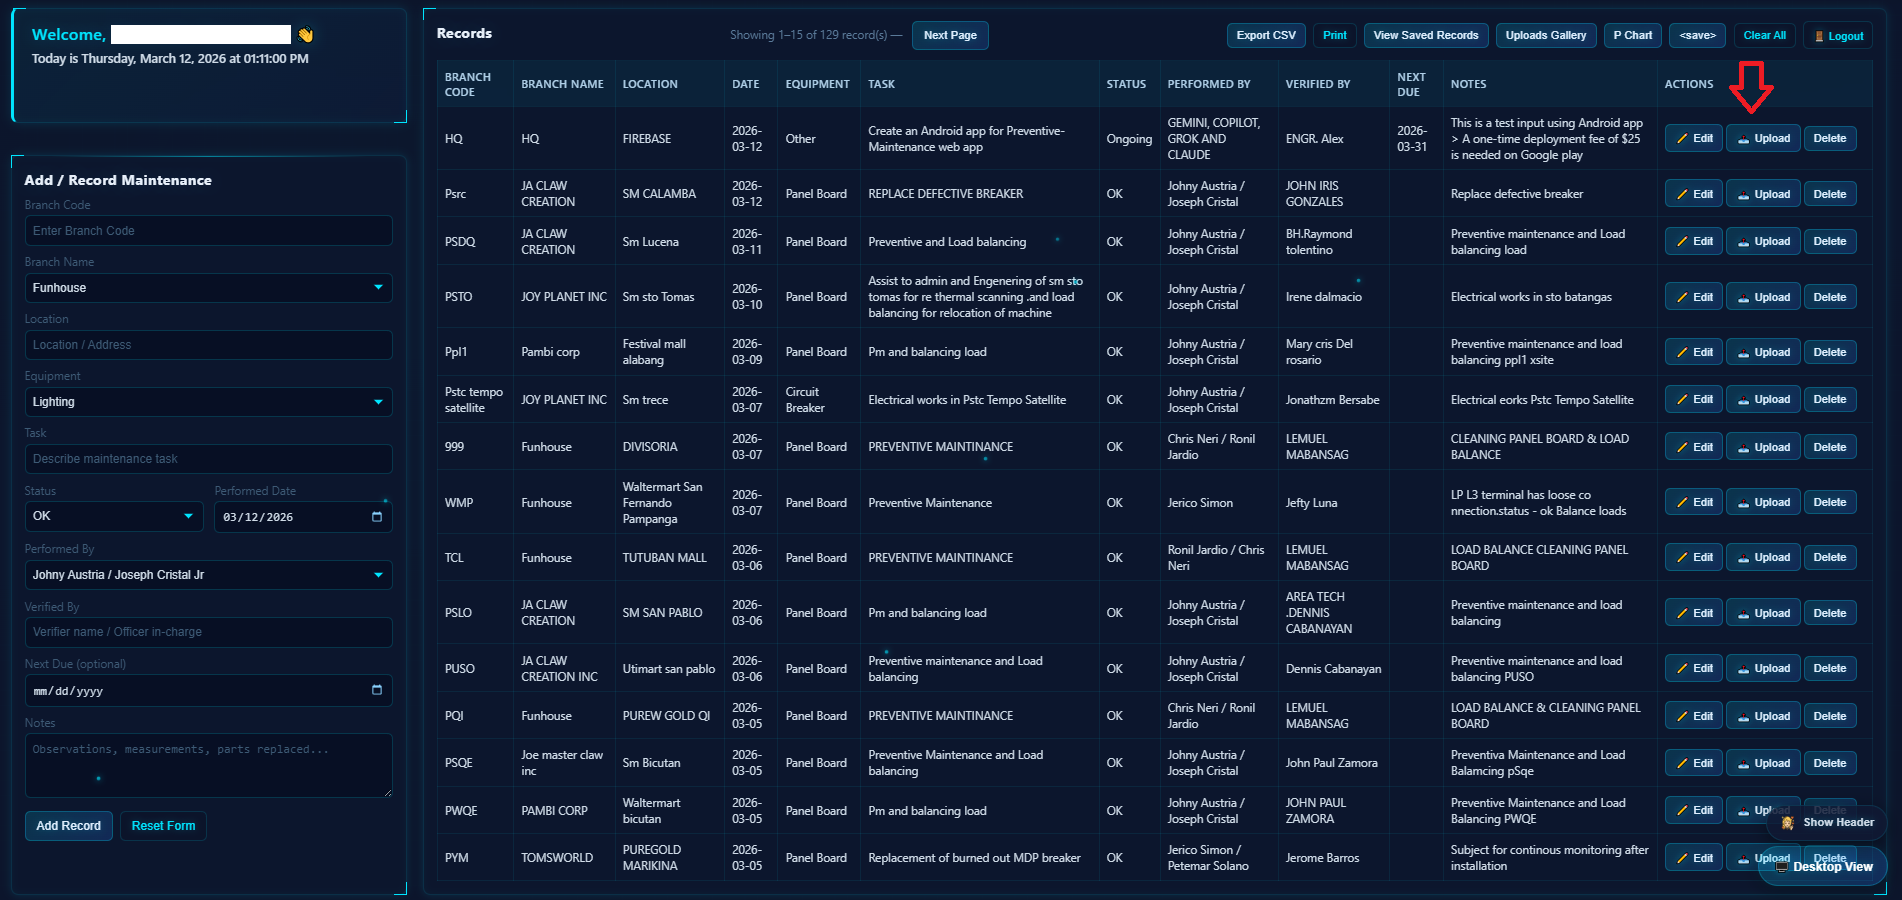
8. Upload your images or videos using the Upload button. Make sure you selected your own record
9. If you linked the wrong document, go to Uploads Gallery, find the file, tap Change Link, select the correct record, and you're done.
B. How to generate report
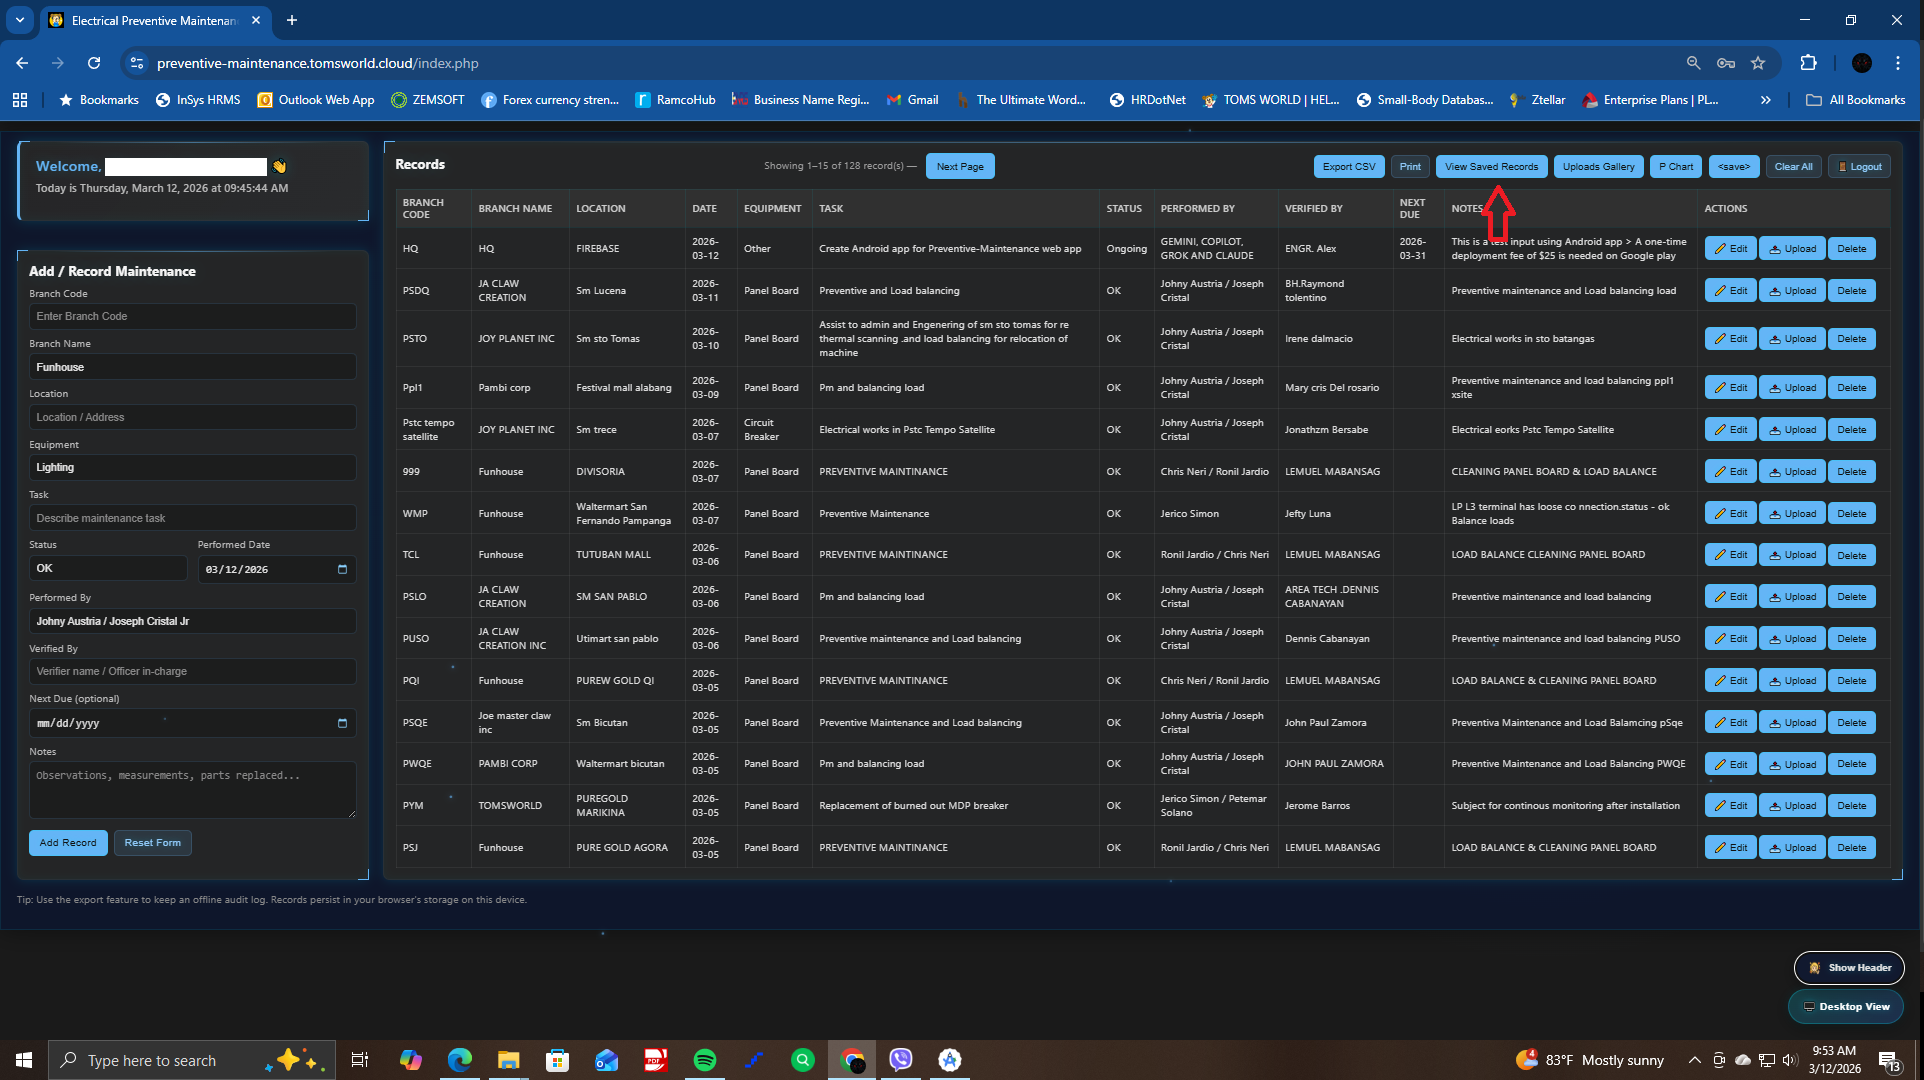
1. On the homepage, tap View Saved Records
2. Use the Documents Filter to select a month or date range. The app will automatically display all matching records
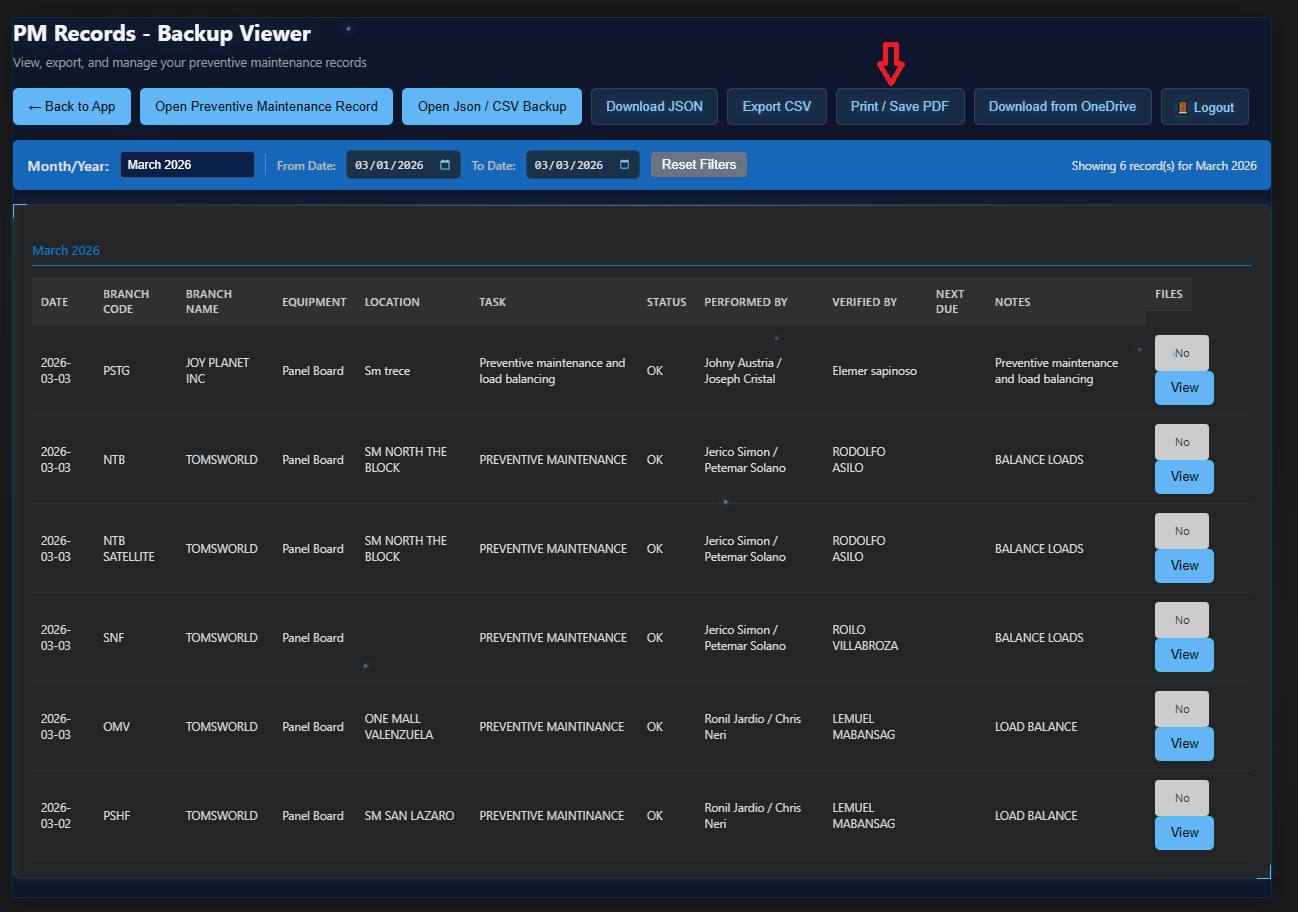
3. Tap Print / Save PDF to generate your report
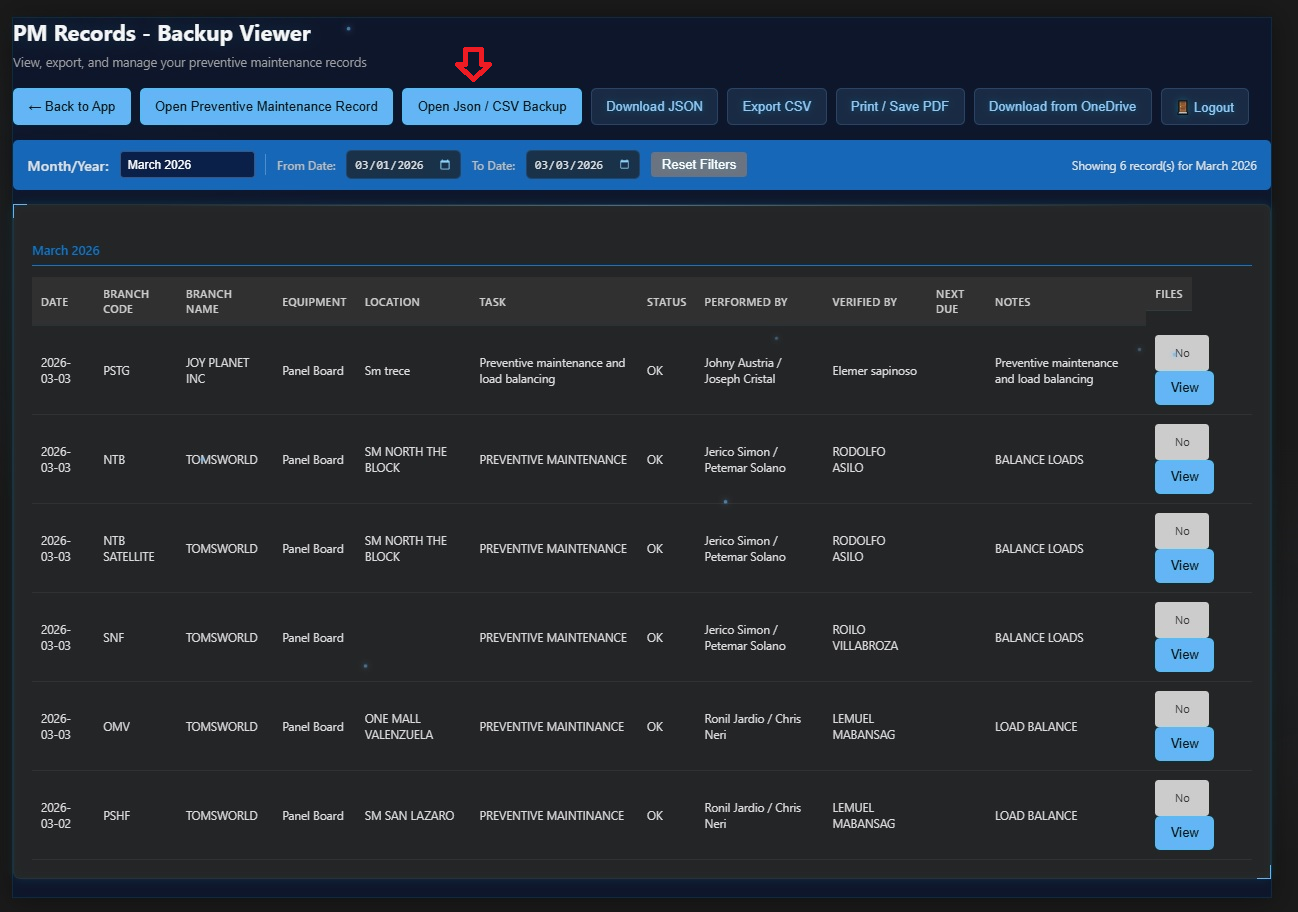
C. How to Upload JSON (Server Migration)
1. On your current server, tap Download JSON
3. Wait for the file to be downloaded copy the JSON file and upload the JSON file to the new server
4. Wait for the server to parse the file, and you're done
5. Do not re-upload the JSON file to the new server it may cause file duplication
6. If the upload failed contact your system administrator
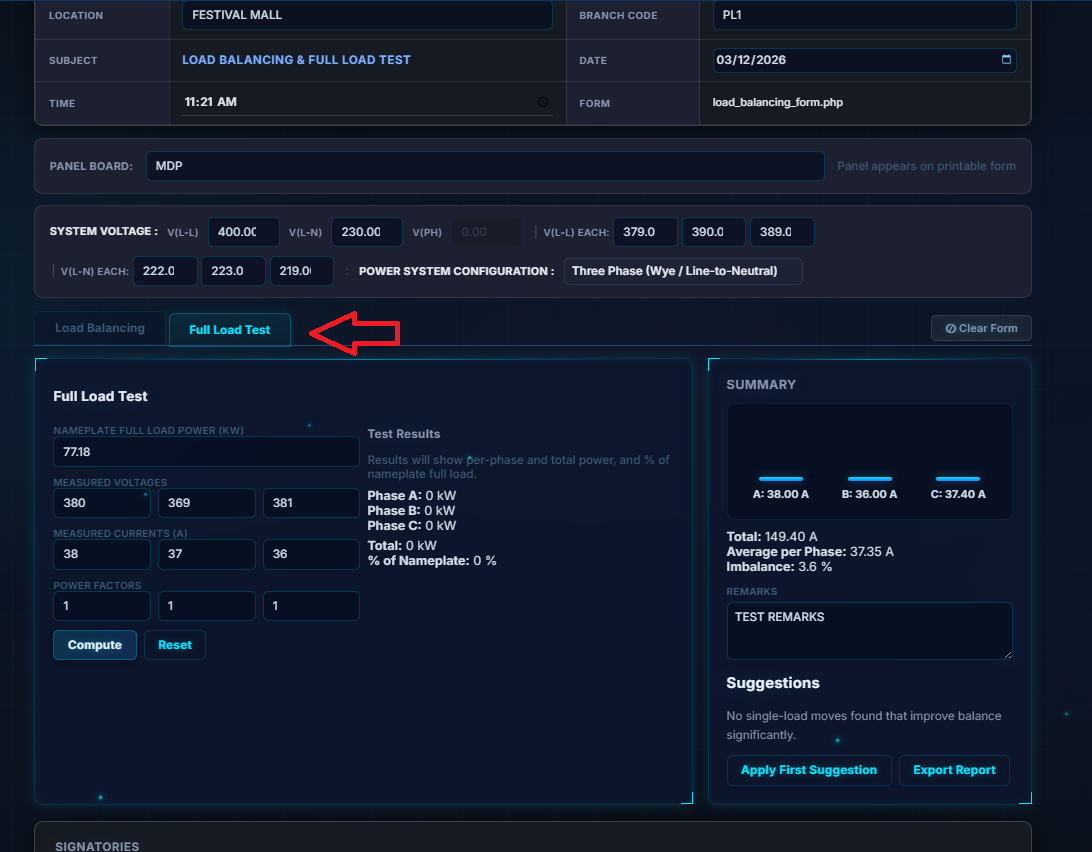
D. How to Use the Load Balancing Form
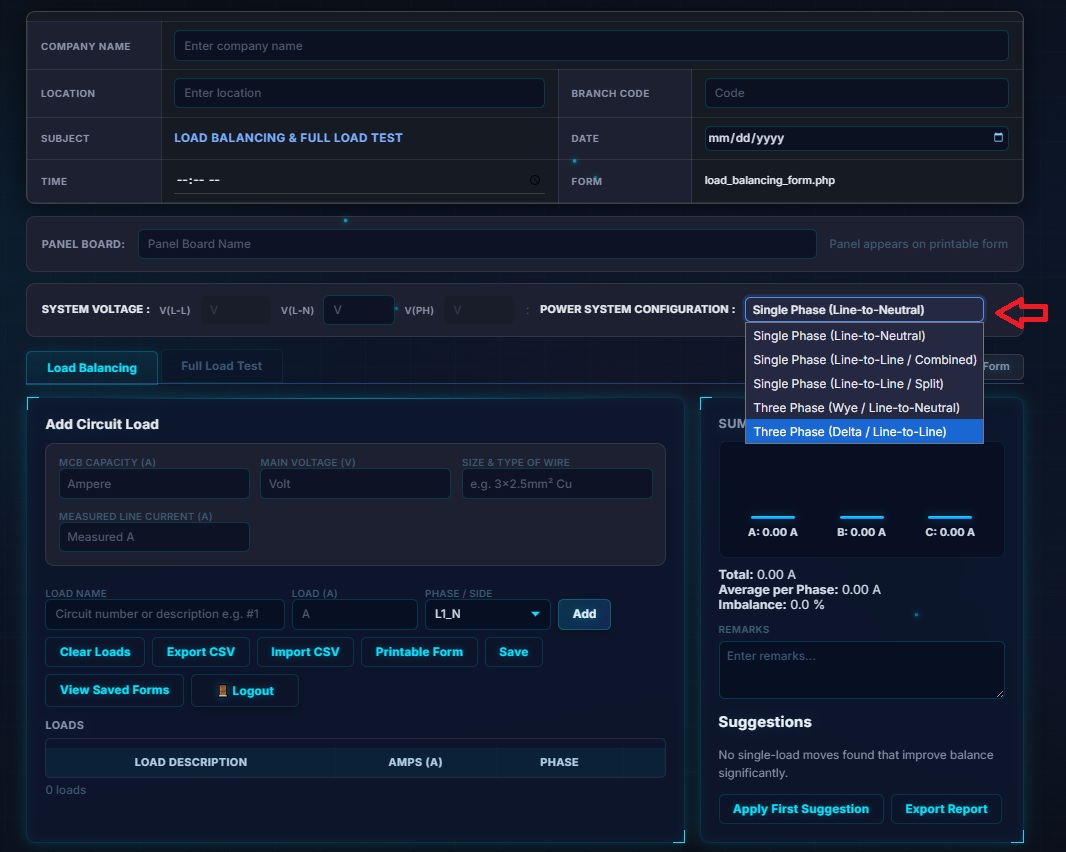
1. On the homepage, open the Load Balancing Form from the header.
2. Fill in all required document details make sure to click clear form first
2. Select the correct Power System / Circuit Type
3. Prepare your multimeter (clamp ammeter) and measure:
3. Voltage and current per phase, Power factor, Neutral current 4. Add each measured load using Add Load. Ensure all circuits (single‑phase or 3‑phase wye/delta) are completed 5. Add a Full load Test Records if Required
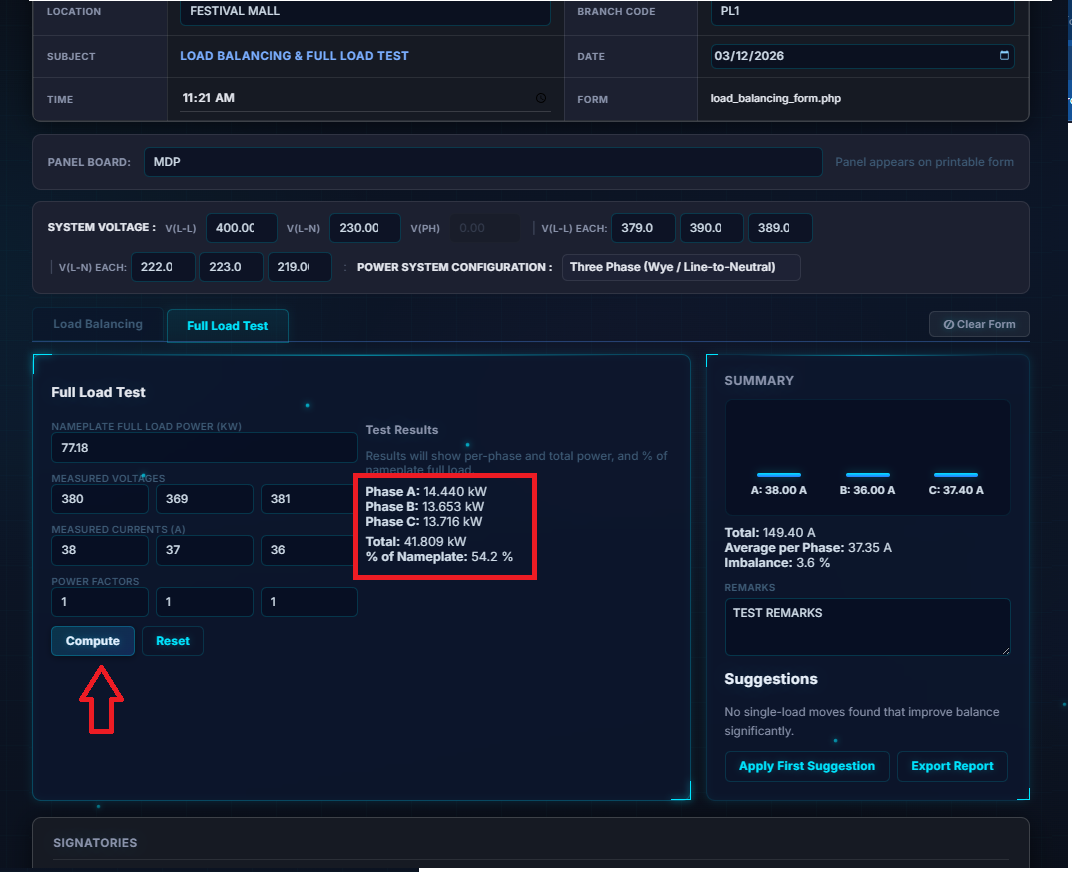
6. Click Compute to proceed with Computation
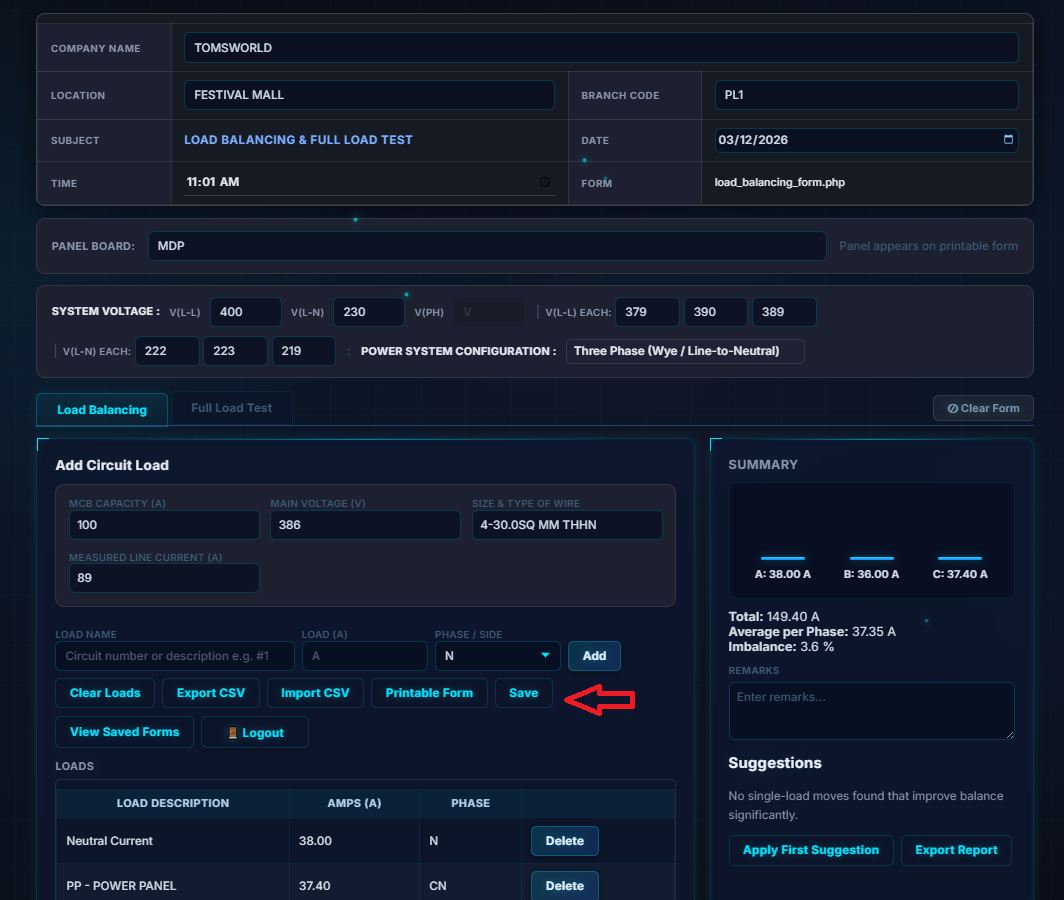
7. Save all measured voltages, currents, and power factor values.
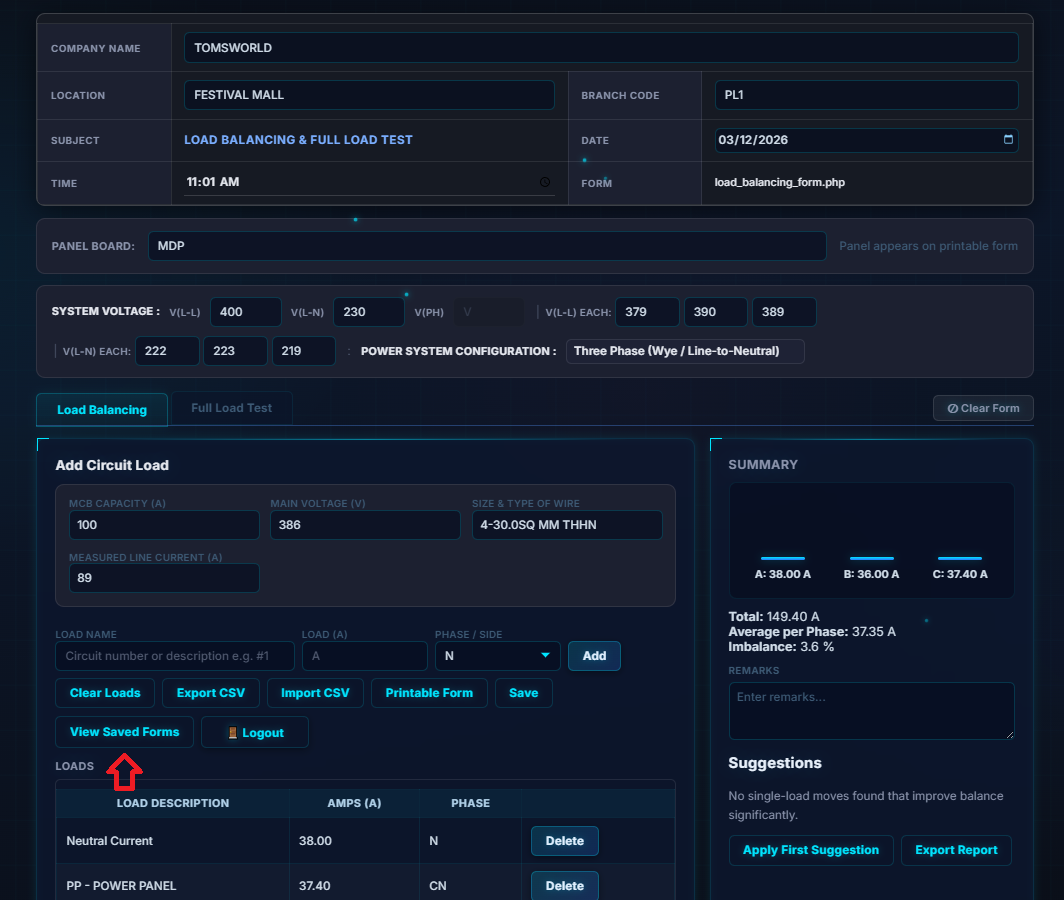
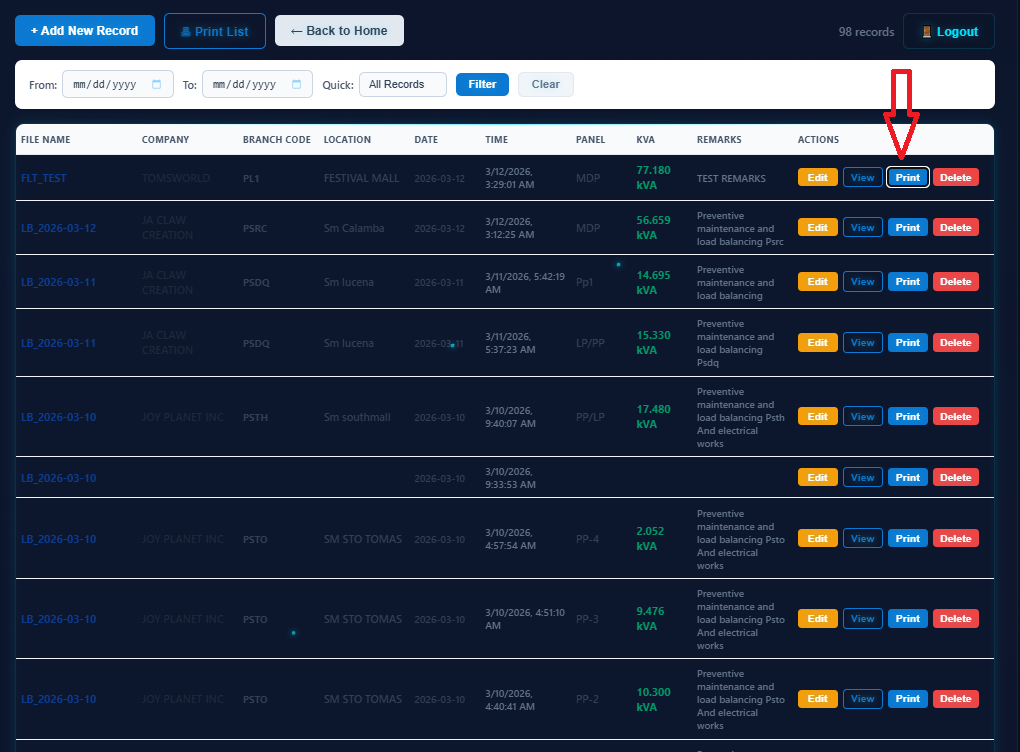
8. To view results, open View Saved Forms, select your file, and print if needed
9. Print Report - Select your file on the list and hit Print
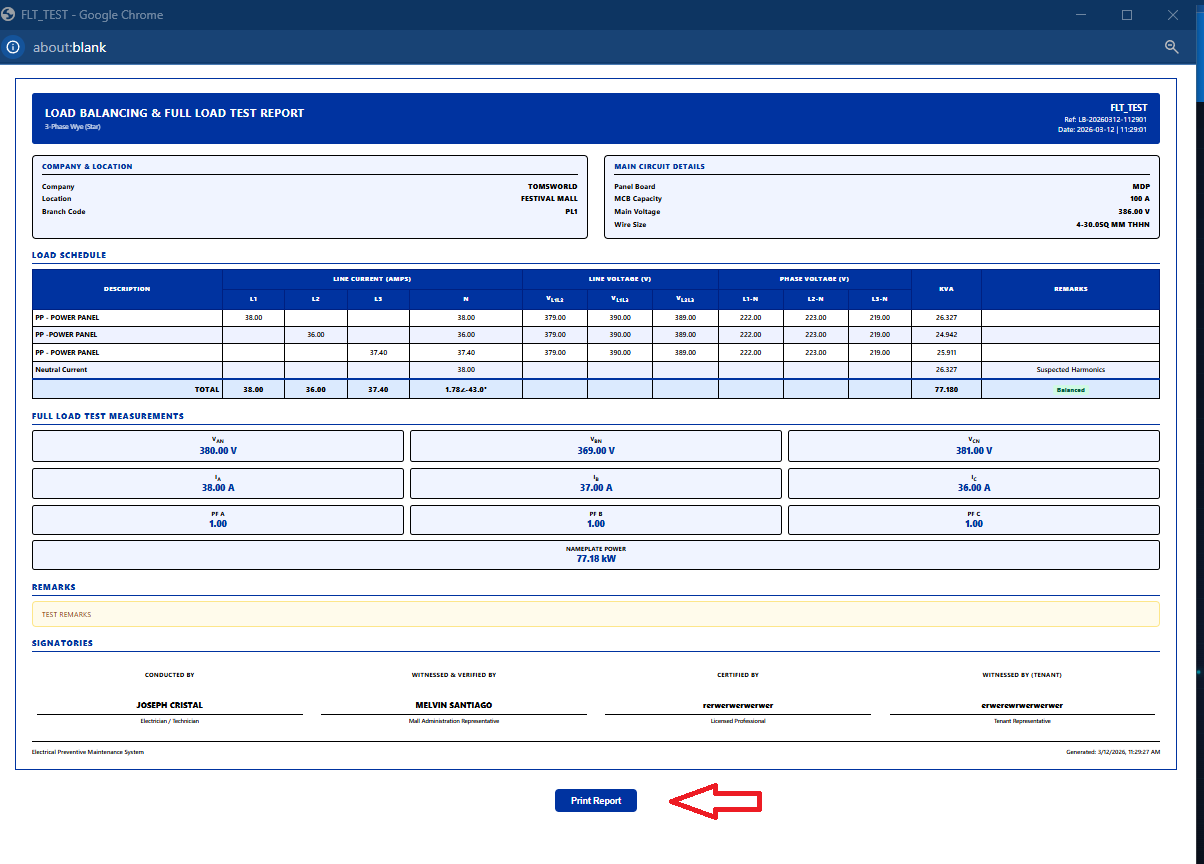
10. The Print Output Should look like this
11.If proper documentation is required, have the signatories sign the form, upload it to PM Records, and you're done
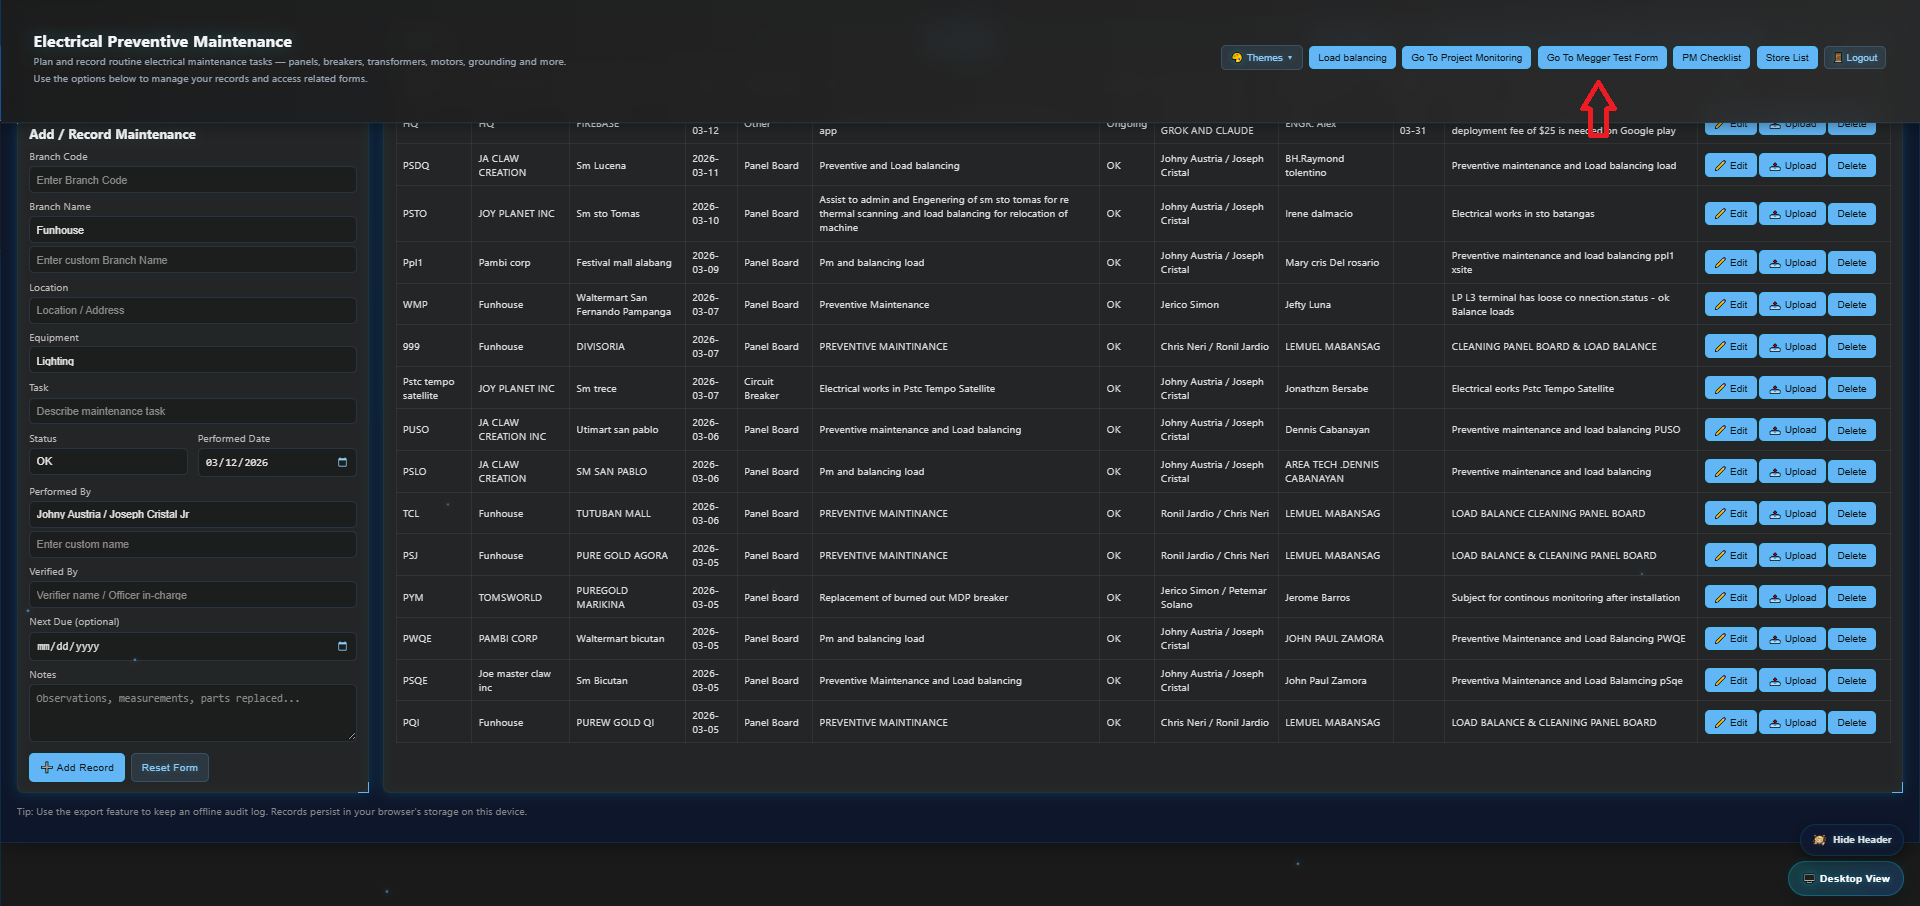
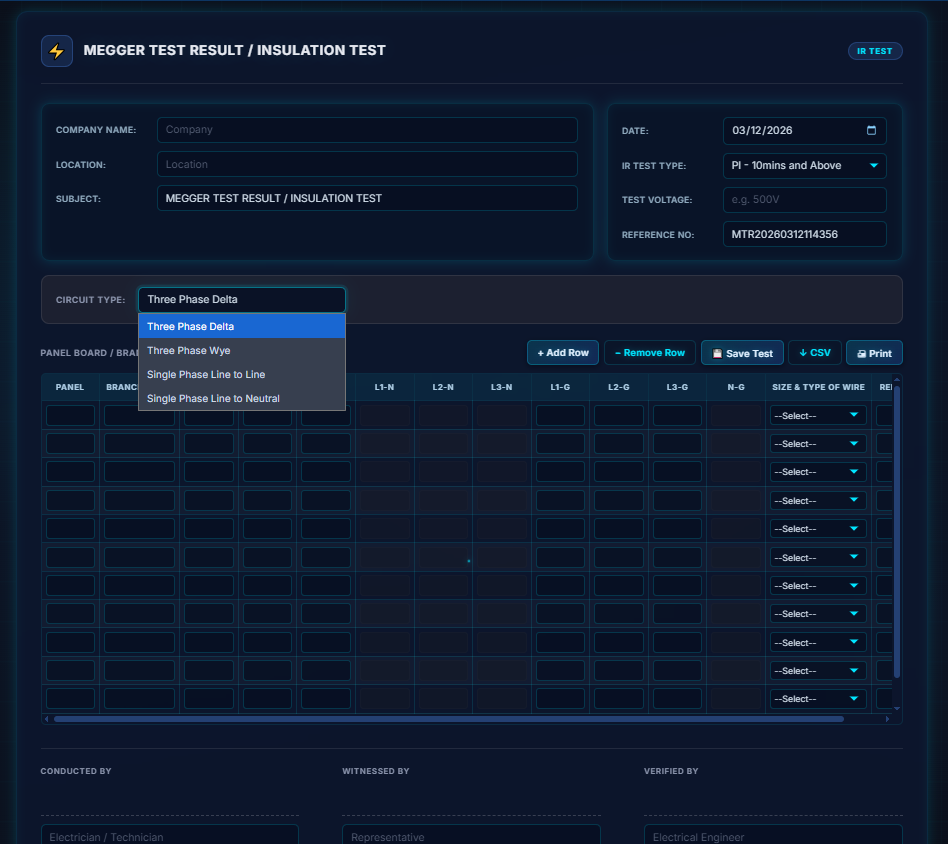
E. How to Use the Megger Test Form
1. On the homepage, open 'Go To Megger Test Form'
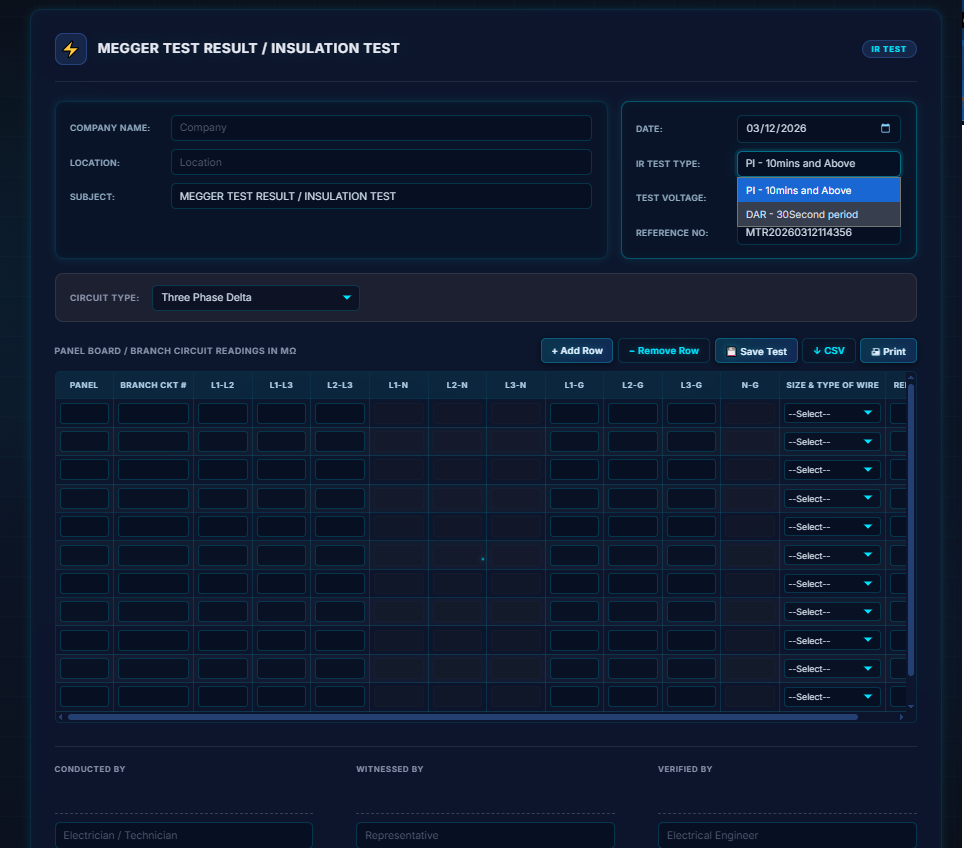
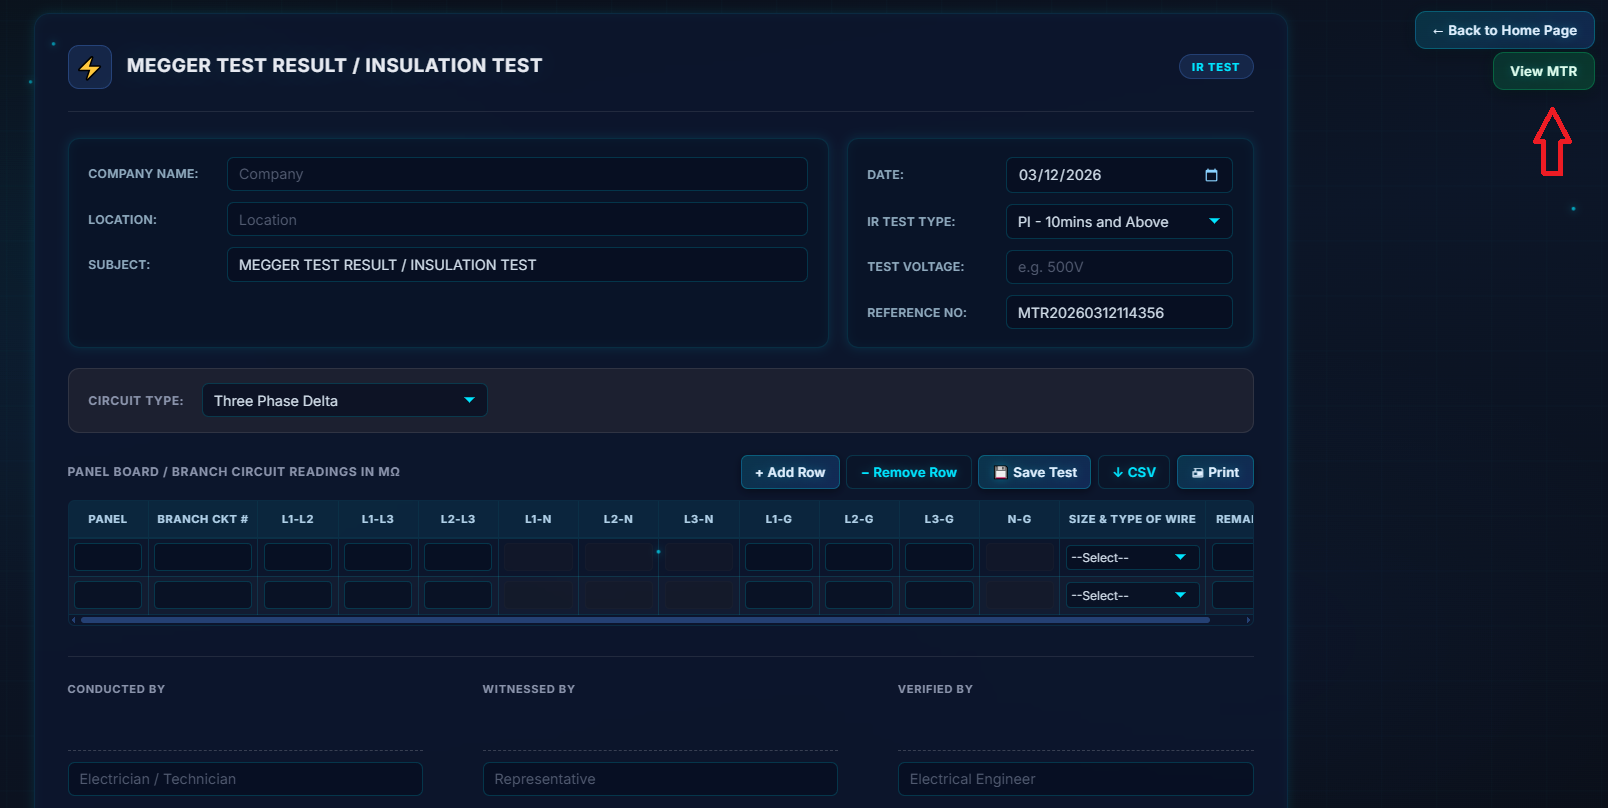
2. Select the Circuit Type and IR Test Type, then fill in all required details
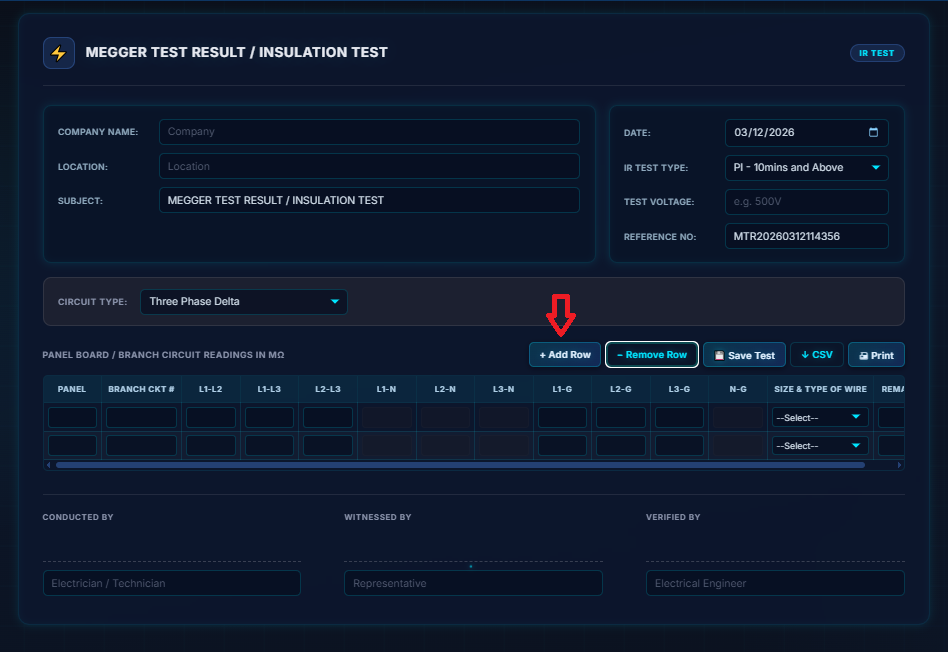
3. Click Add Row to insert more row
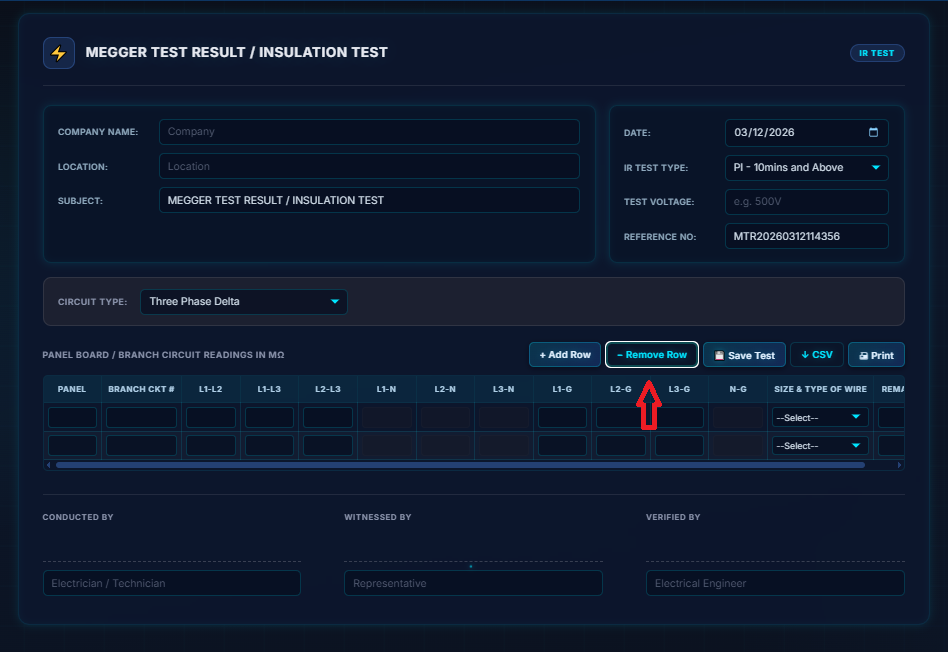
4. Click Remove Row to delete any extra rows
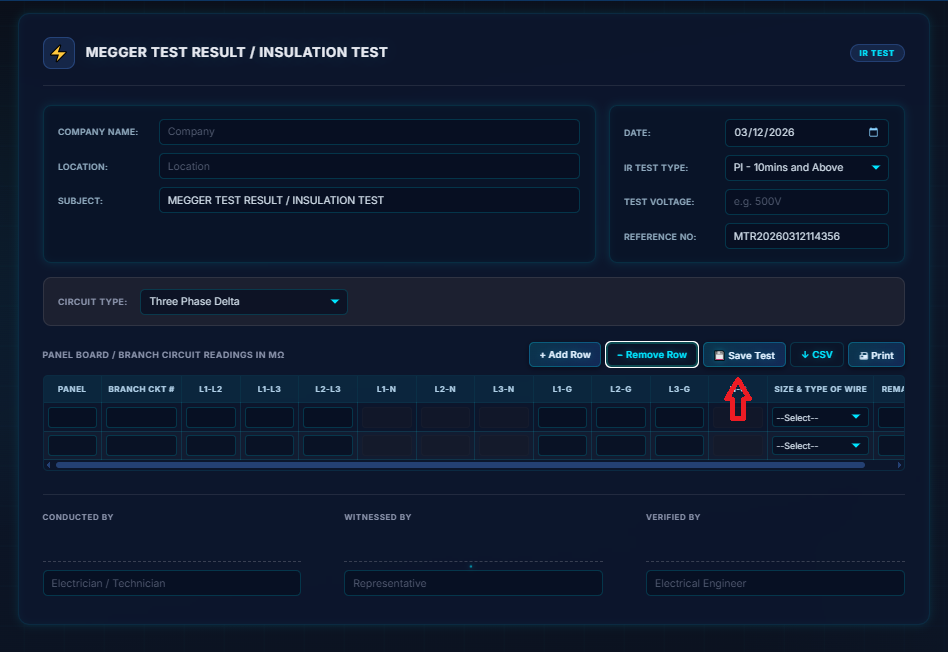
5. Save the test using Save Test
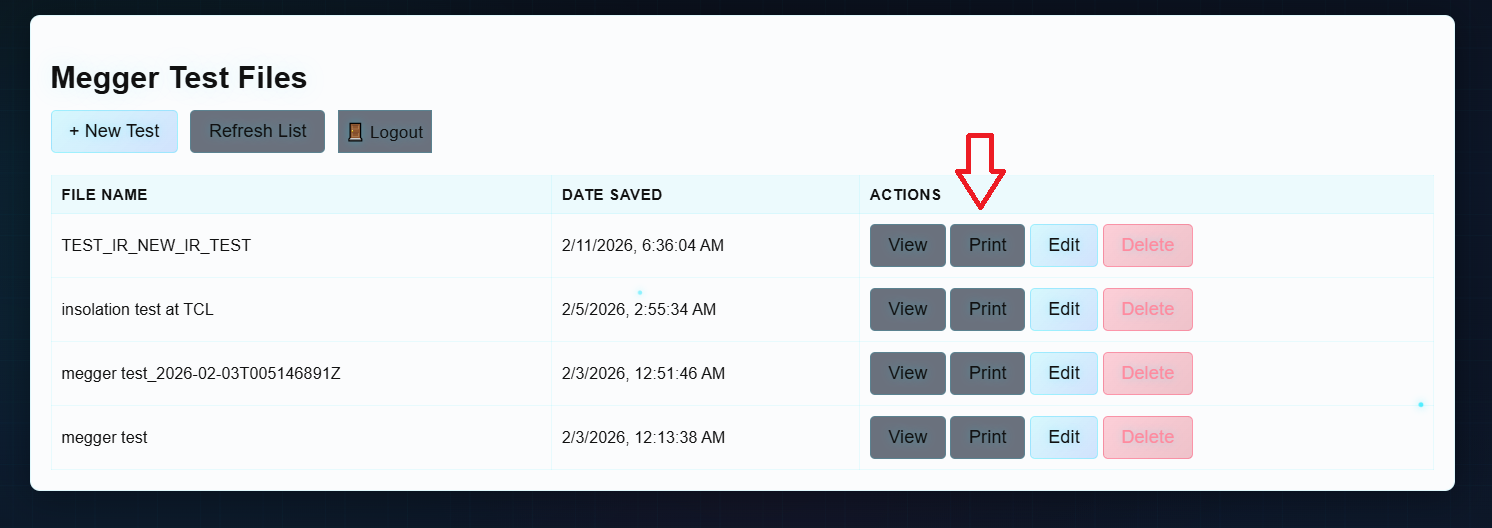
6. Open View MTR to see saved results
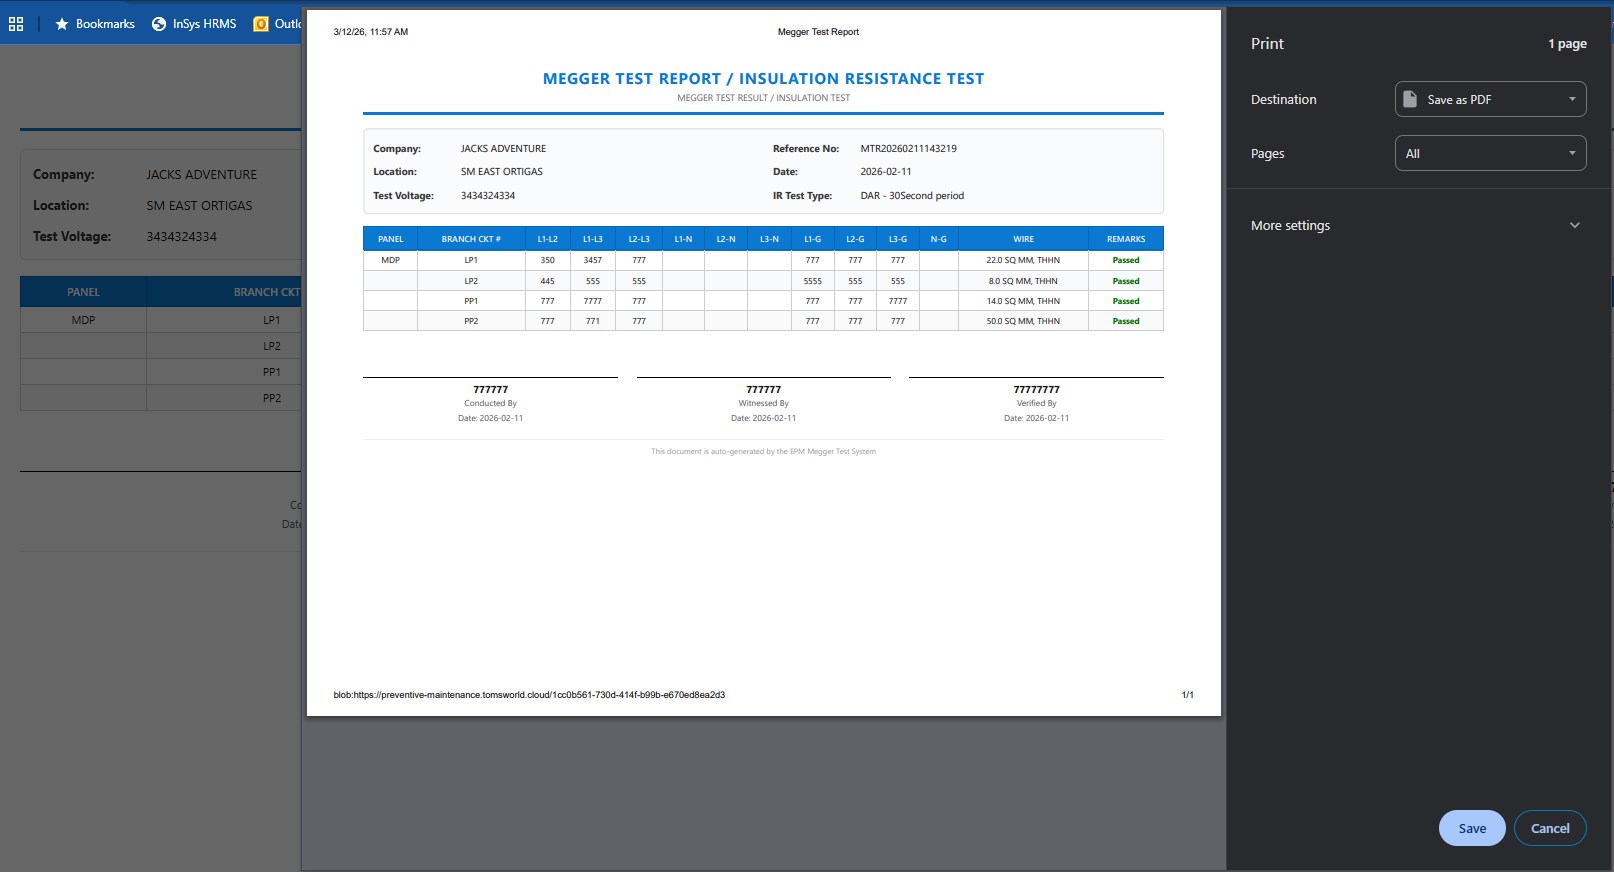
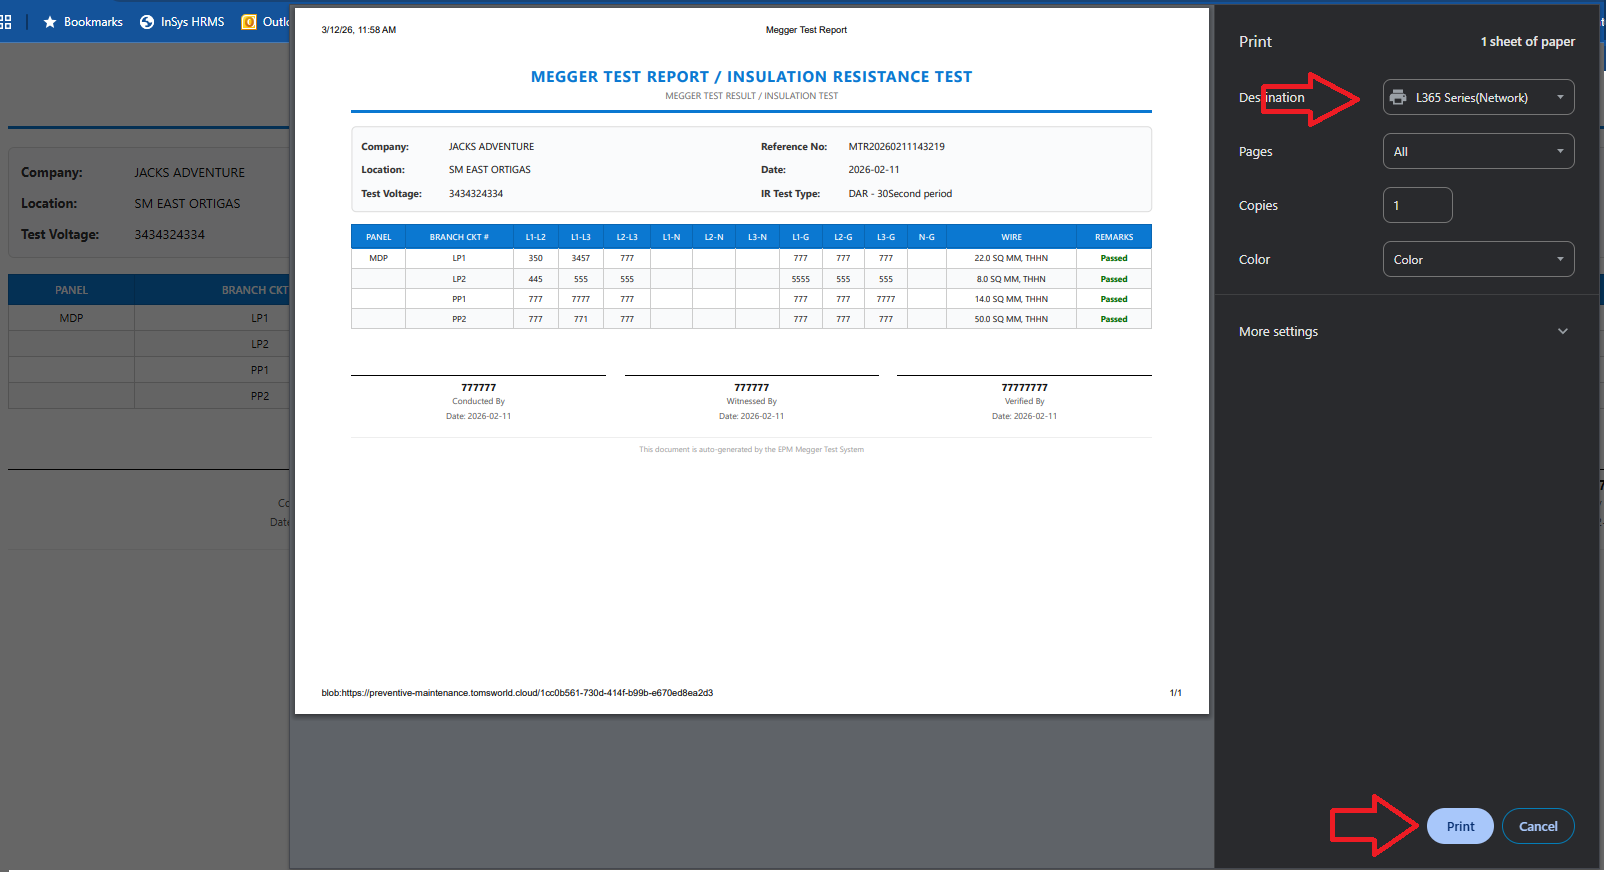
7. Print the record if needed
8. Print output look like this, Ensure the document is properly signed
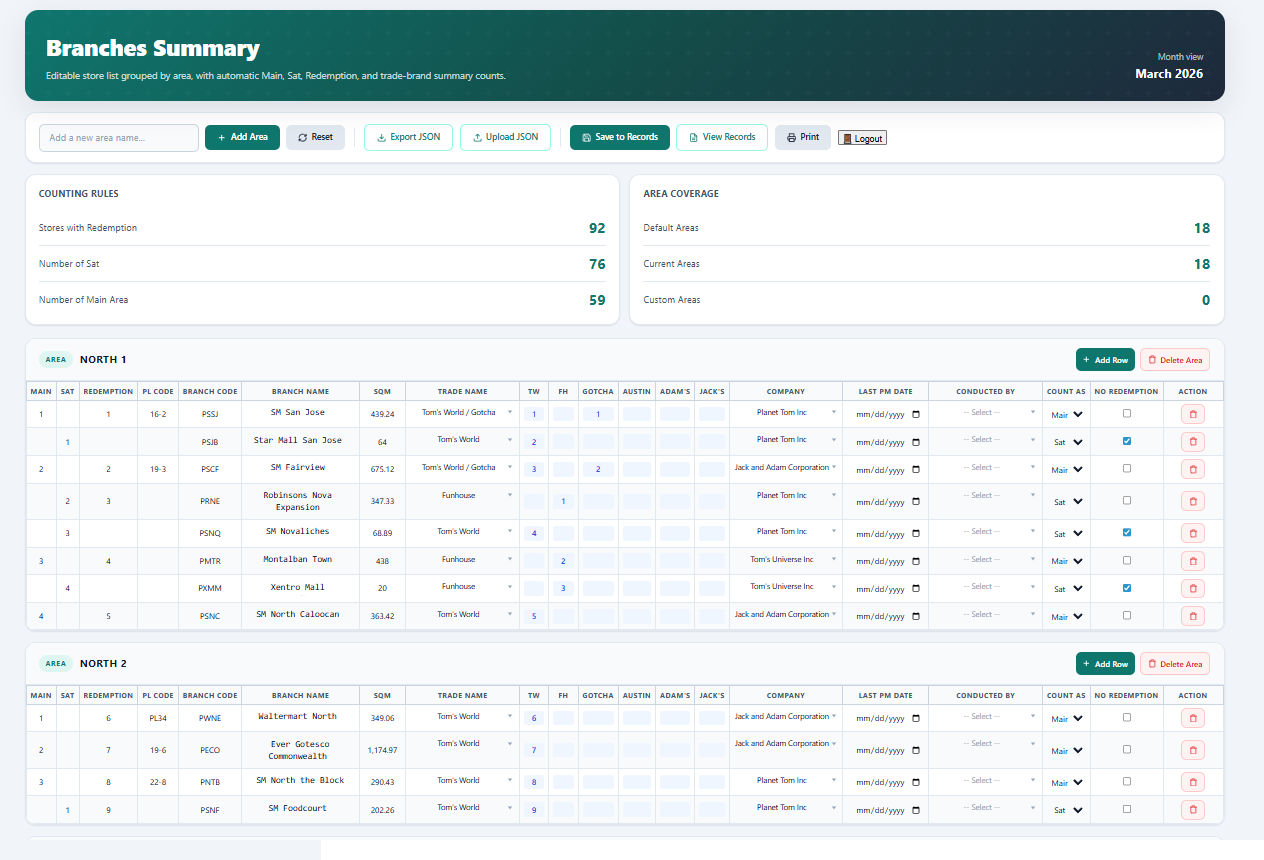
F. How to Use the Store List
1. On the homepage, open Store List from the header
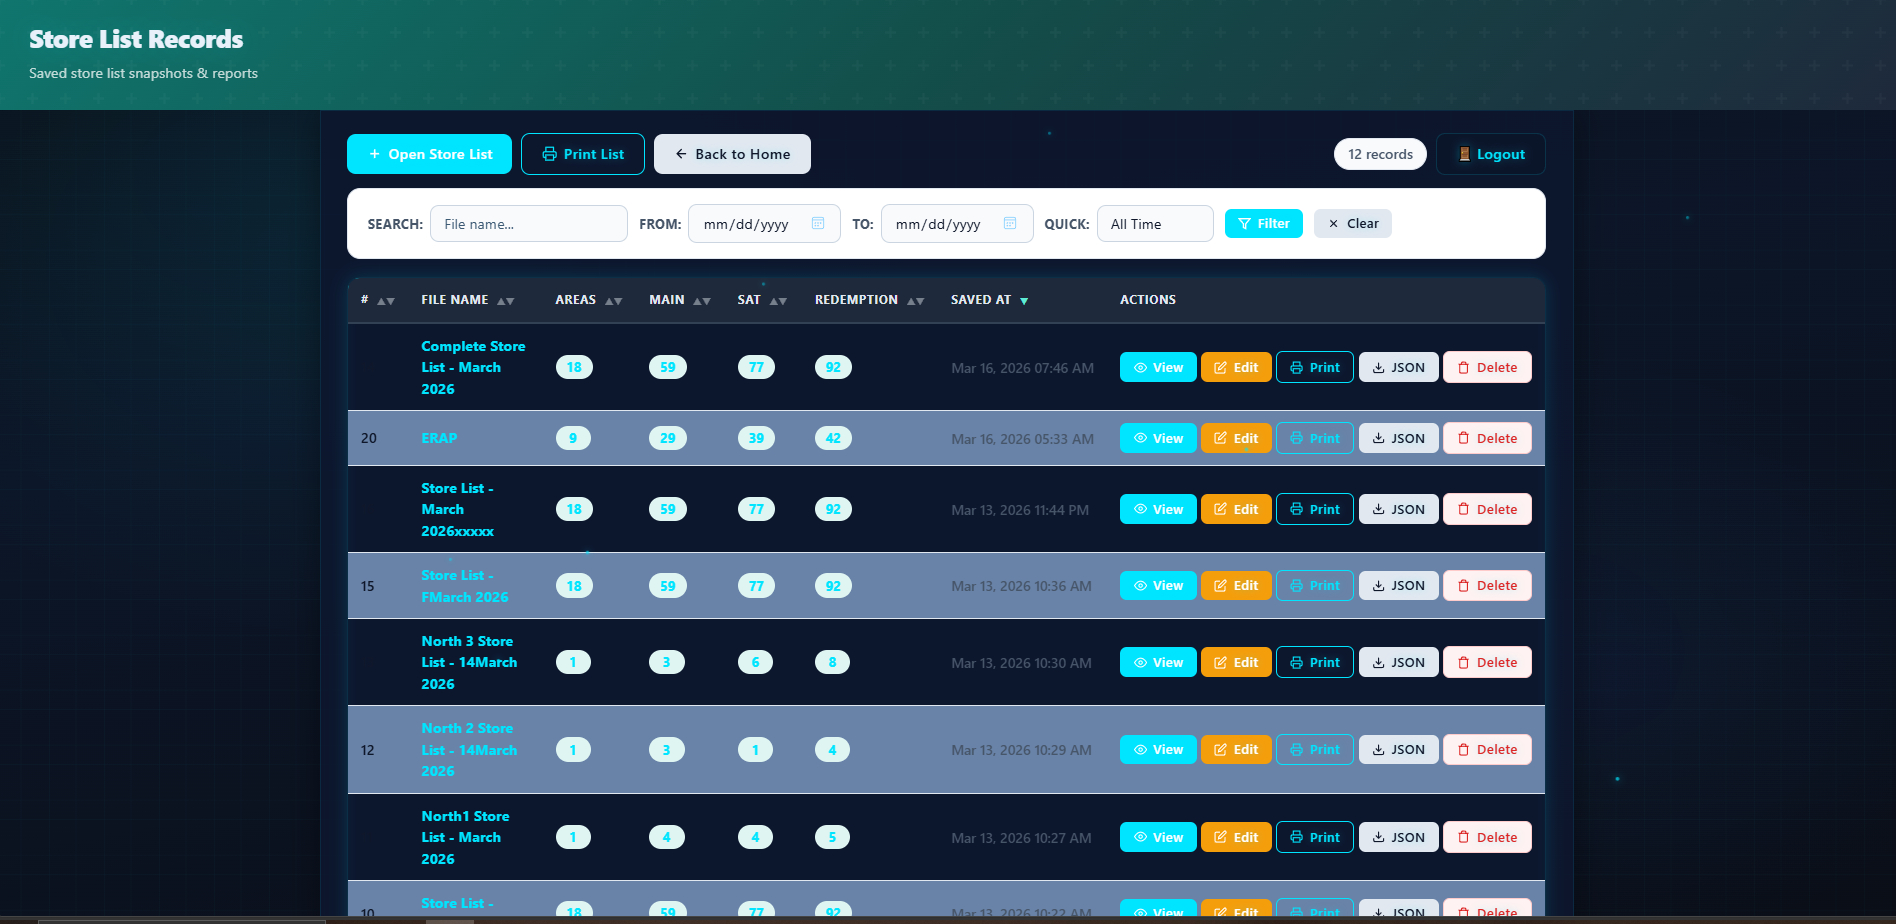
2. This is where you can manage the store list—you can add or delete stores or areas, then open View Records to select the updated list
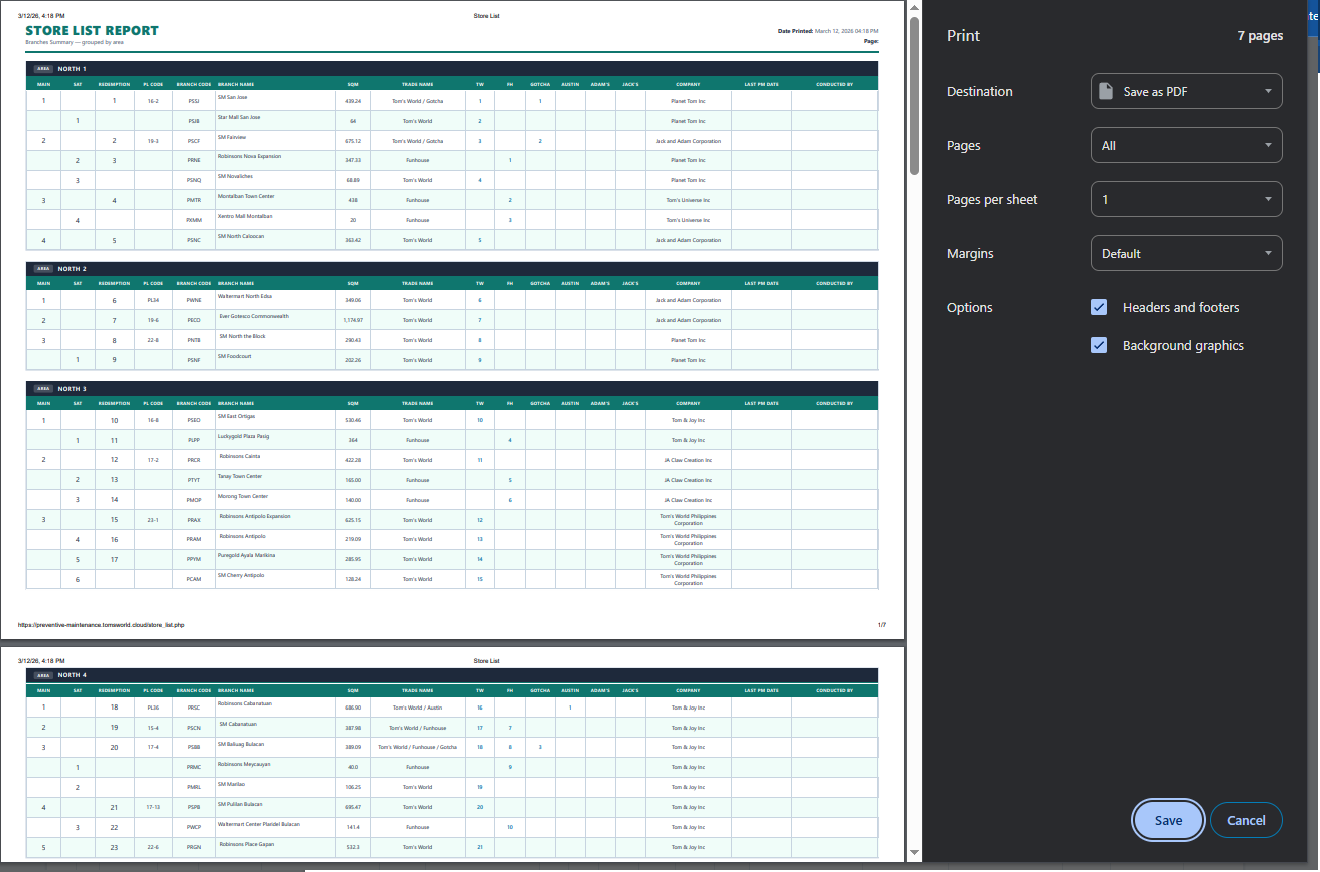
3. Tap Edit to update store details, last PM date, and the person who performed the PM 4. Save the updated store list 5. Print if needed
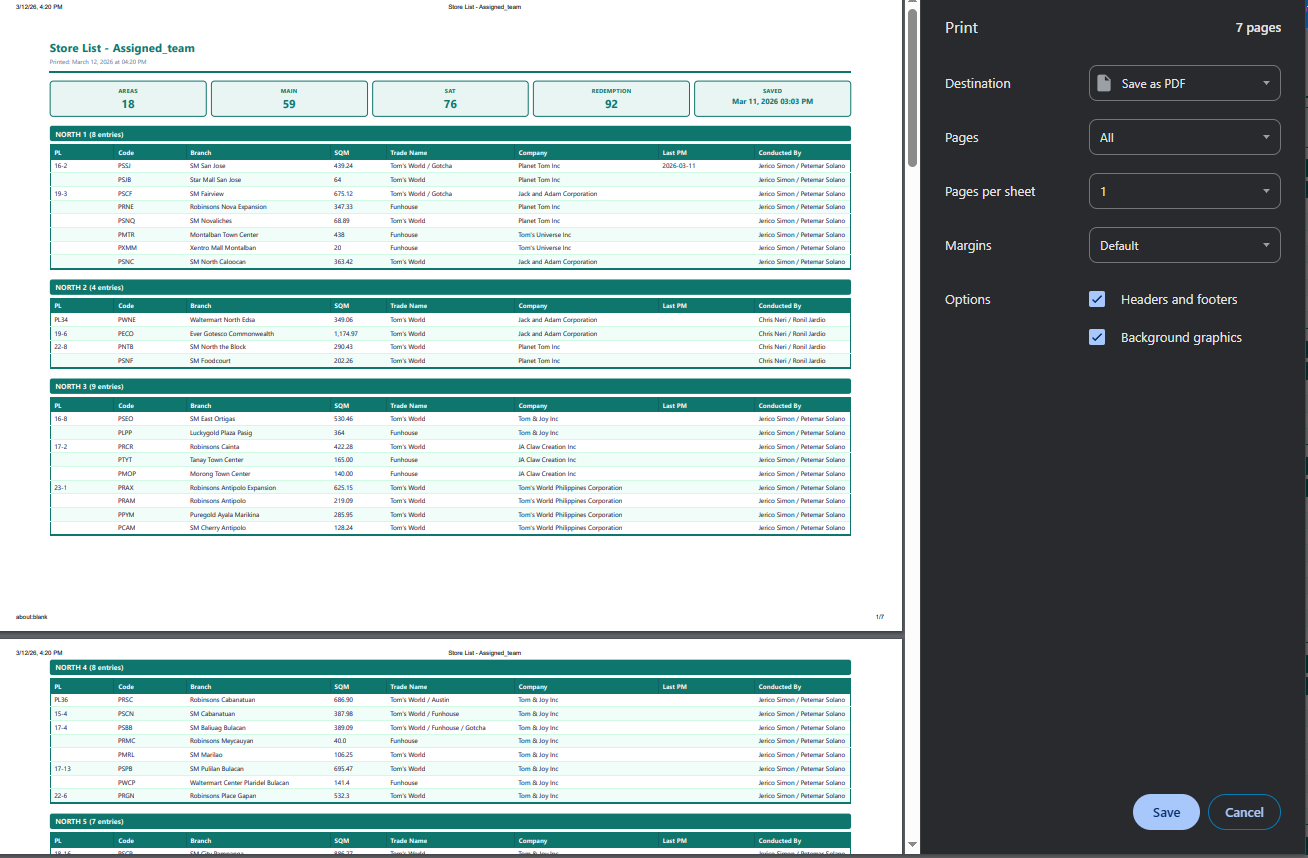
6. The print output is shown below. There are two print options: one on the Store List landing page and another in the Store List Records.
G. Performance View
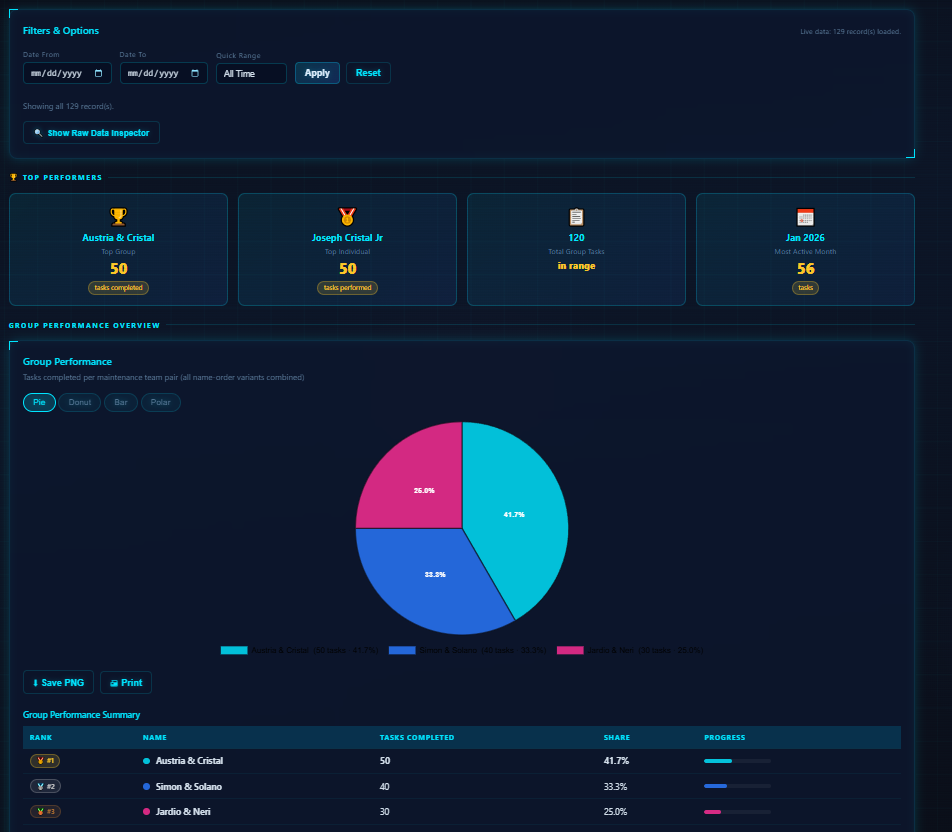
1. In PM Records, tap P Chart
2. You will be redirected to the performance page
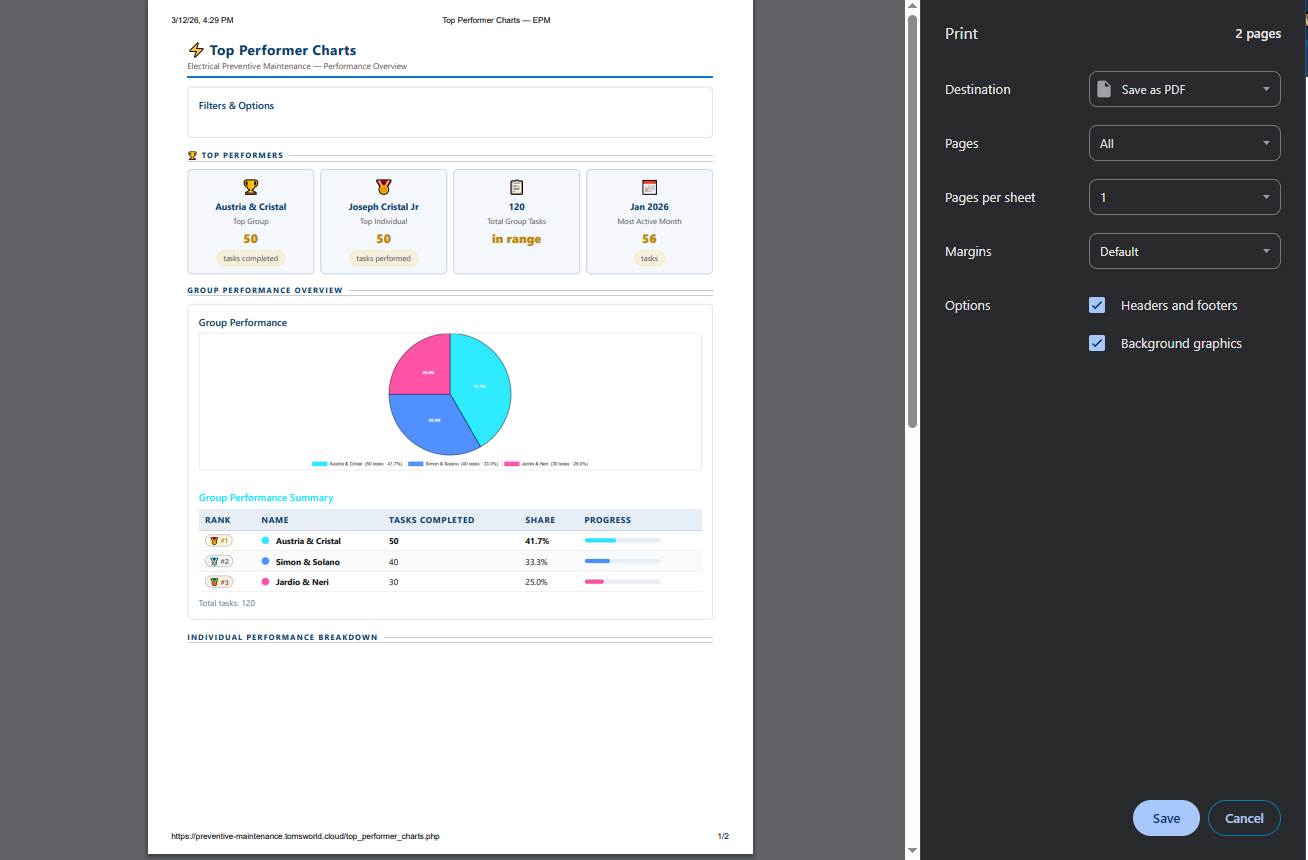
3. You can print the performance chart if needed, see sample print output below
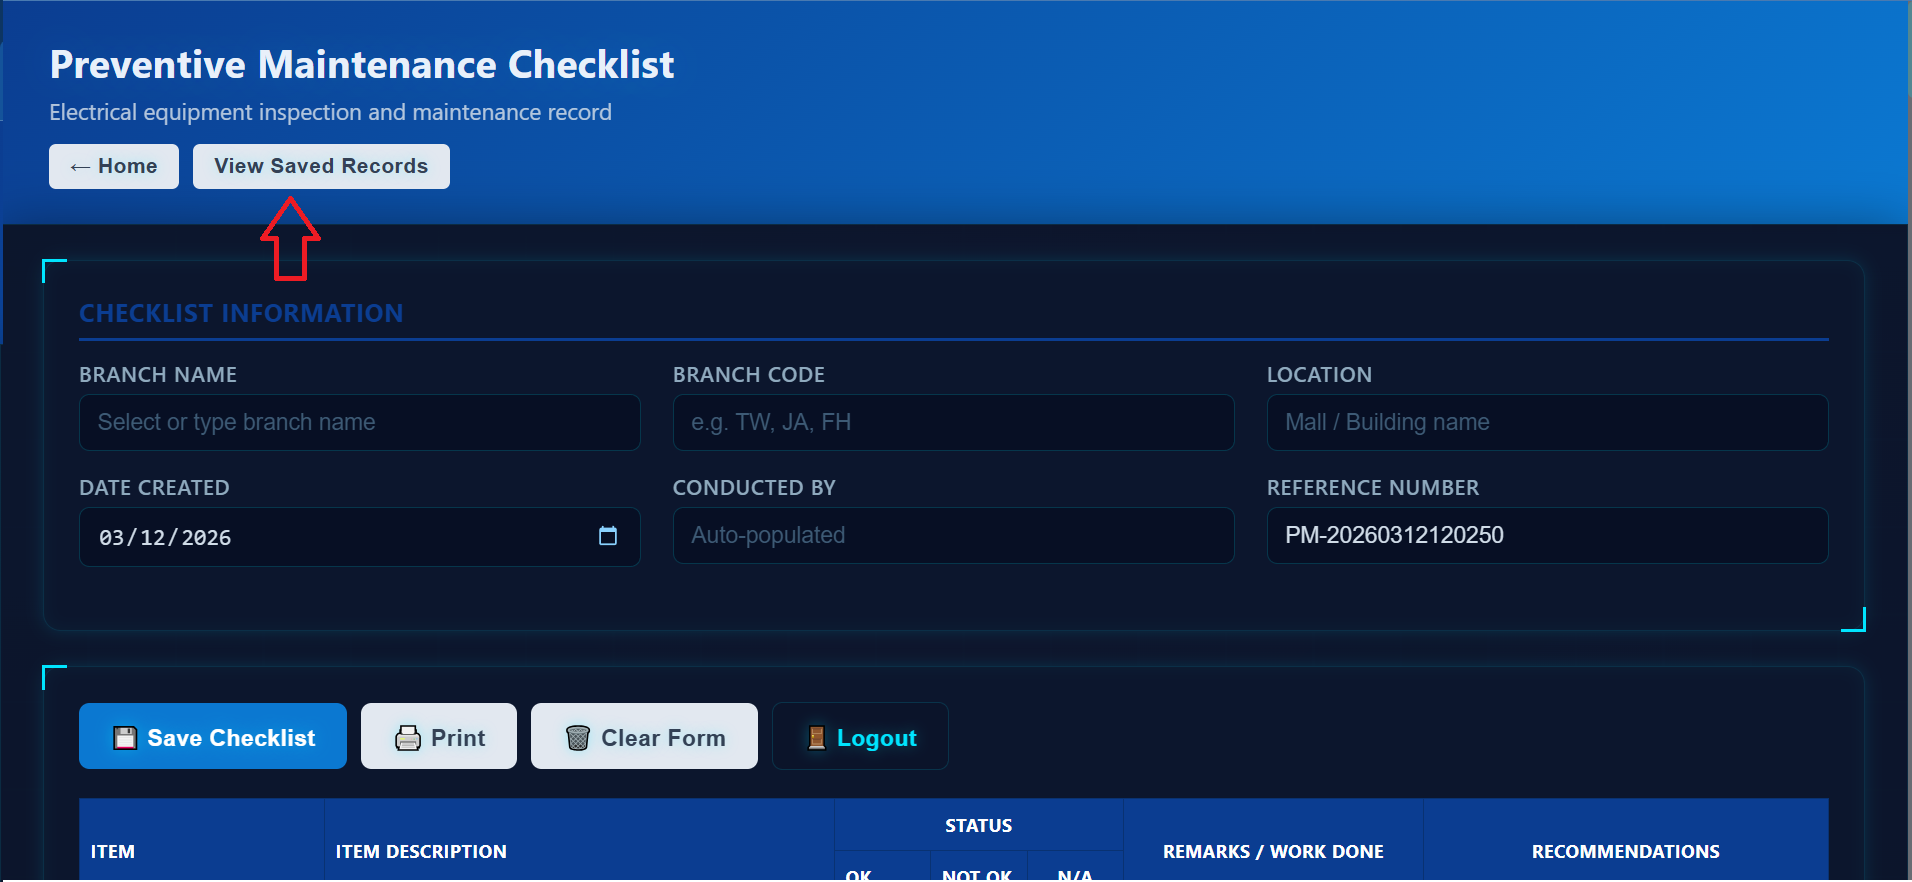
H. How to Use the PM Checklist
1. Ensure the header is visible on the homepage, Click PM Checklist to open the form
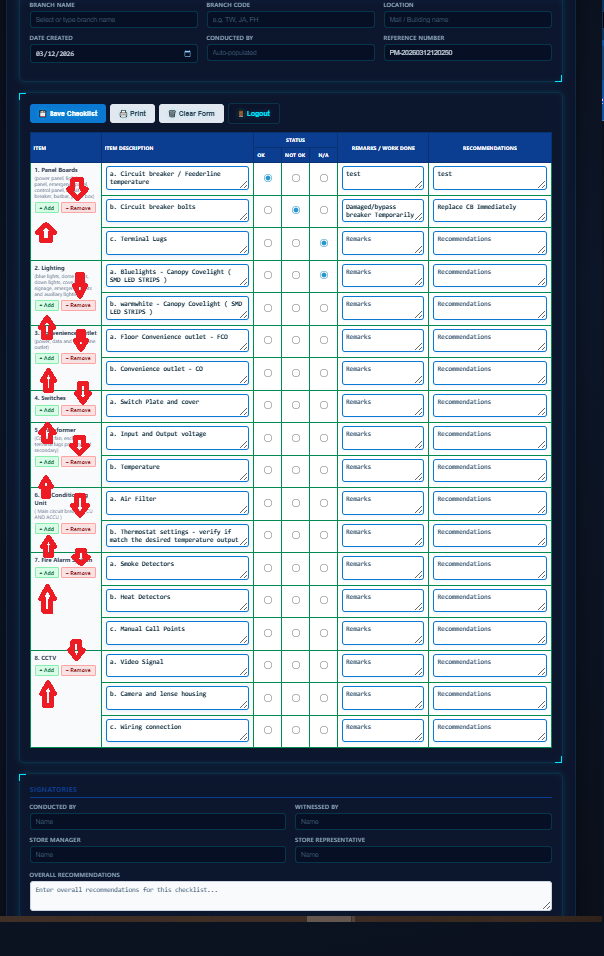
2. Fill in all required information
3. Add or delete checklist rows as needed, or tap N/A if an item doesn’t apply.
4. After inspection, make sure the Checklist status matches the store’s actual condition 5. Save the checklist, then open Saved Forms
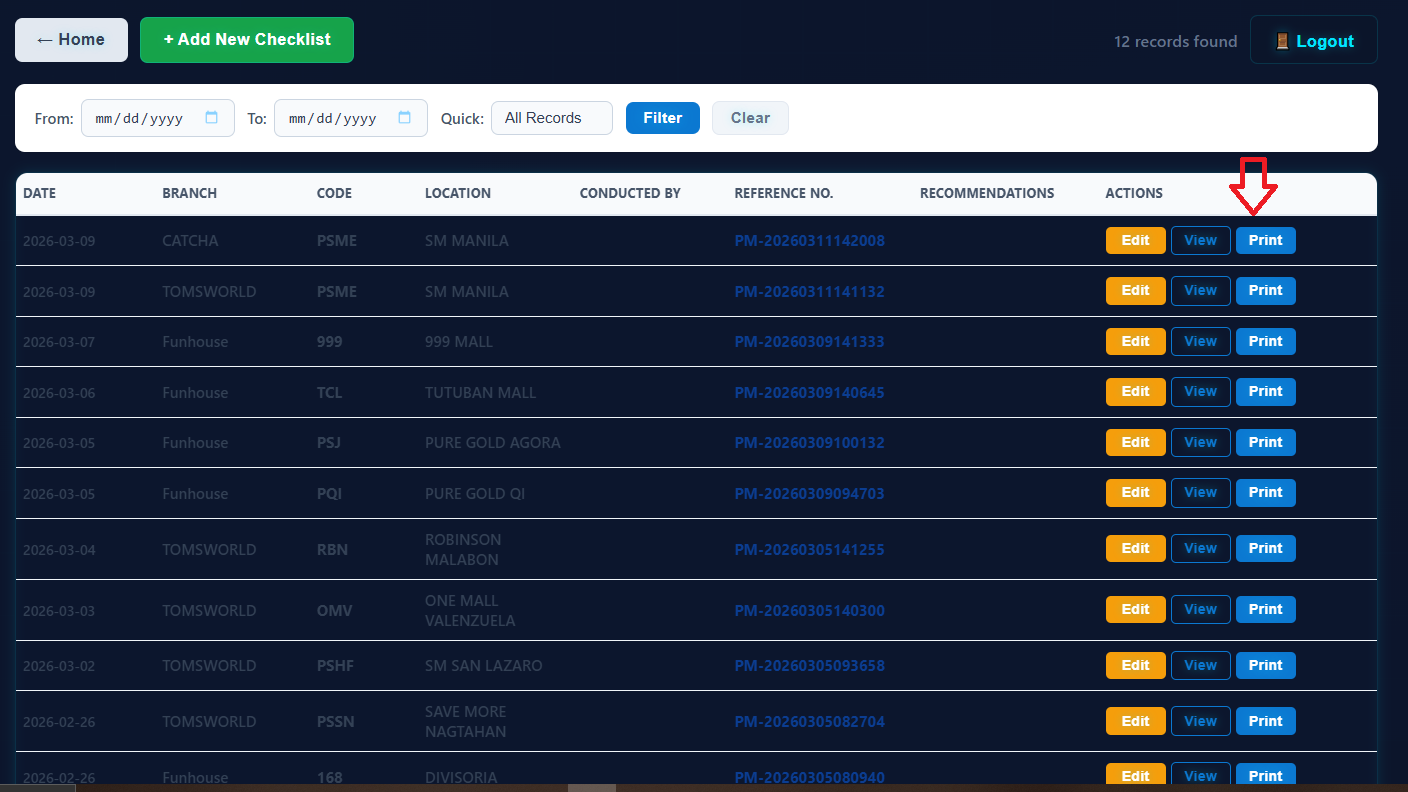
6. Click on the 'View Saved Records'
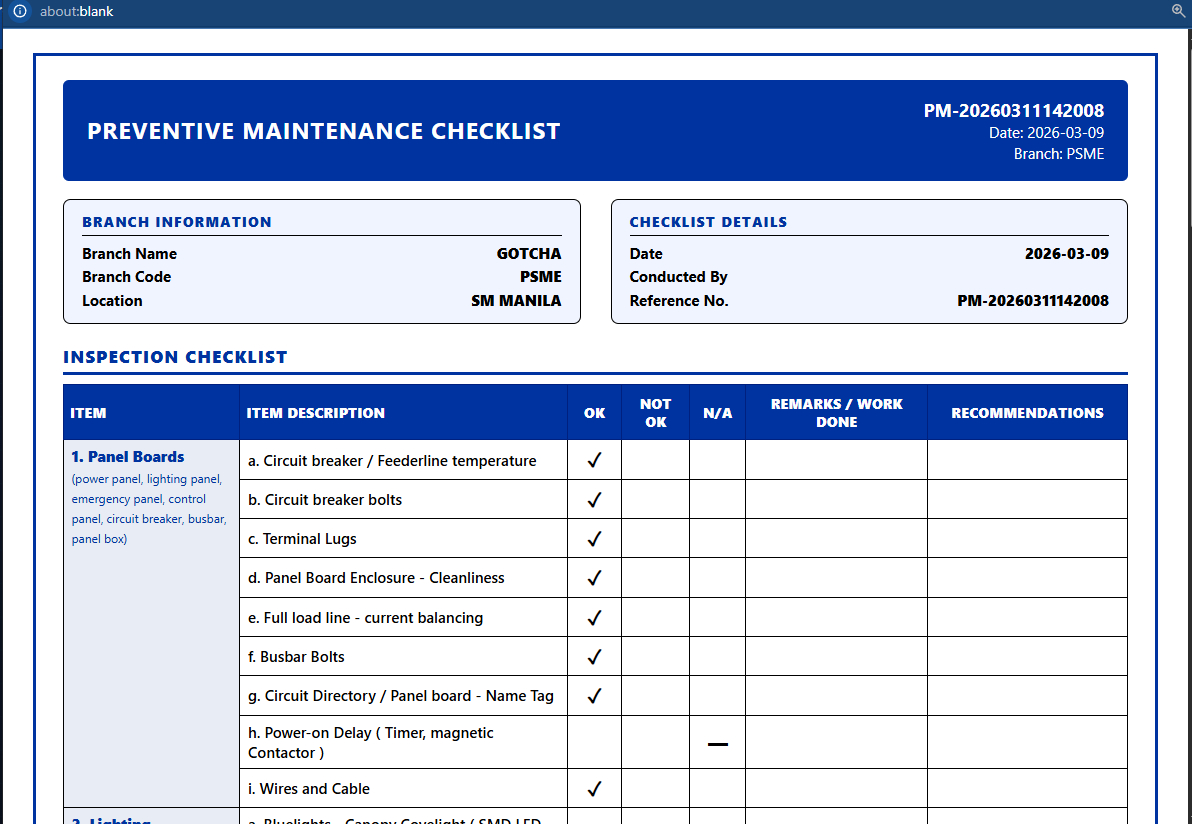
7. Click Print to generate a copy
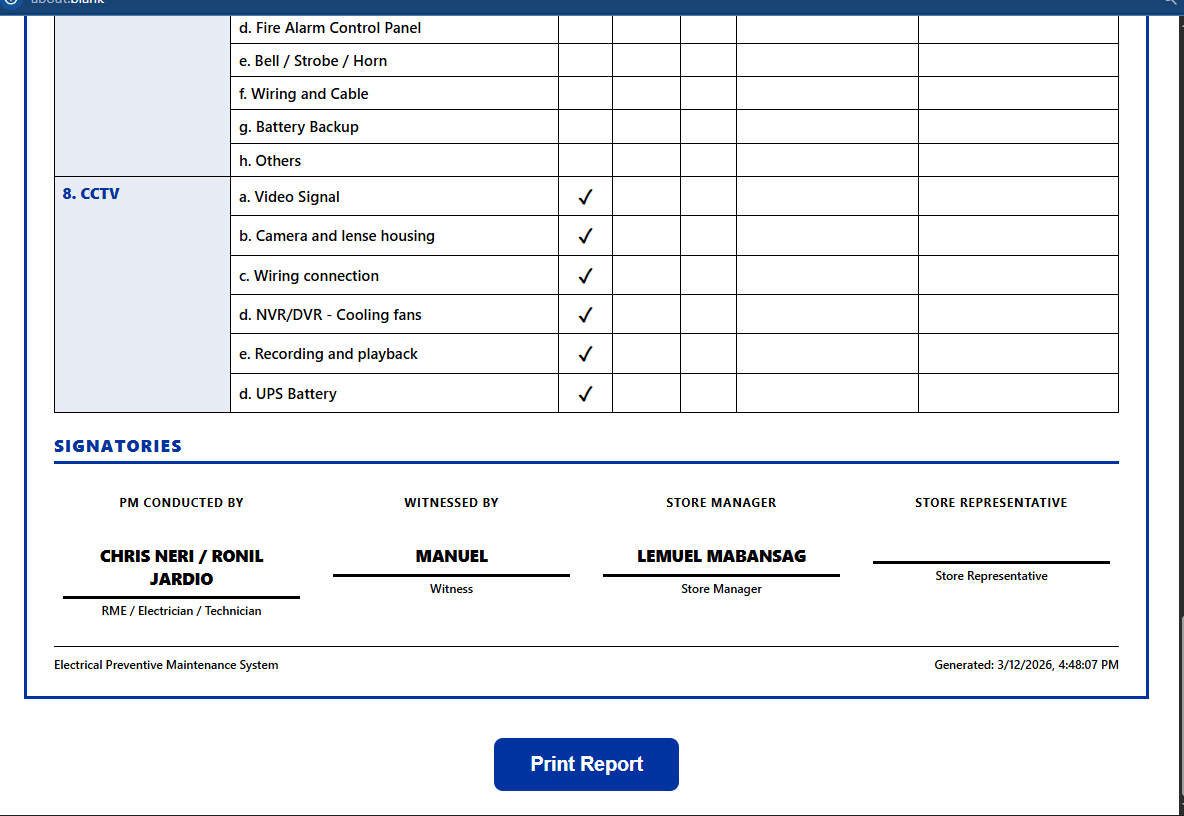
8. Ensure the document is properly signed 9. (Optional) Upload the signed PM Checklist to PM Records using the Upload button